In this article
To put tissue paper in a gift bag, line the bag with one sheet, set the gift in the middle, then add two or three more sheets on top, each turned at a slightly different angle. Pinch the middle, lift the corners so they stand above the rim, and let the paper fluff. The whole job takes about two minutes.
This guide shows the method step by step, how many sheets to use for each bag size, four styles you can copy (fan, puff, layered and wrapped), how to choose colors, and how to protect fragile gifts and stop things falling out. If you sell products, it also explains how branded tissue paper fits into your packaging.
Need the bag too? See our guides to making a bag out of wrapping paper and to making a sturdy gift bag.
Key takeaways
- Line first, fill second. Start with a sheet in the bottom of the bag so the gift sits in a nest of paper.
- Use two to four sheets. One looks flat and five looks stuffed. Add one at a time and stop when the top looks full.
- Turn each sheet. Rotating the sheets so the corners point in different directions is what gives the top a full, even shape.
- Tissue is decoration, not protection. Fragile or liquid gifts need a box, a pouch or proper cushioning under the tissue.
- Keep the colors simple. Two colors, or one color in two shades, almost always looks better than a mix.
What You Need and How Much Tissue to Use
You do not need much: a gift bag, a gift, tissue paper and, if you like, a ribbon, tag or sticker to finish. Scissors help when you need to trim the sheets.
Common tissue sheets are about 20 by 30 inches, but sizes and weights vary by seller. Gift bags vary too, so treat the table below as a starting point and adjust to your bag.
| Bag size | Sheets to start with | Cut size | Notes |
|---|---|---|---|
| Small (about 5 to 6 in wide) | 1 to 2 | About 15 to 20 in square | Fan or wrapped styles work well |
| Medium (about 8 to 10 in wide) | 2 to 3 | About 20 in square | The classic layered look |
| Large (12 in wide or more) | 3 to 4 | Full sheets, 20 x 30 in | Add a lining sheet so the gift does not show |
Tissue is thin, so a pale sheet can show a dark gift through it. Use a sheet that matches or contrasts with the gift, or add a second sheet underneath.
Other Things Worth Having
- A ribbon or twine to tie the handles.
- A tag with the name of the recipient.
- A sticker to hold a tissue wrap closed.
- A flat surface, so you can fold each sheet properly.
Step by Step: The Basic Method
1. Prepare the Gift
Put the gift in its box or wrap it first. A loose gift slides around inside the tissue, so a boxed or wrapped gift gives the bag a firm shape. Small items, such as jewelry or lip balm, are best in a little box.
2. Line the Bag
Open the bag and lay one sheet of tissue paper across it, pressing the middle down to the bottom and letting the corners hang over the rim. This is the lining sheet. It hides the bottom and gives the gift a soft nest.
3. Place the Gift
Set the gift in the middle. A heavy gift goes at the bottom, and a tall gift stands with its top about an inch below the rim, so the tissue can cover it.
4. Add the Second Sheet
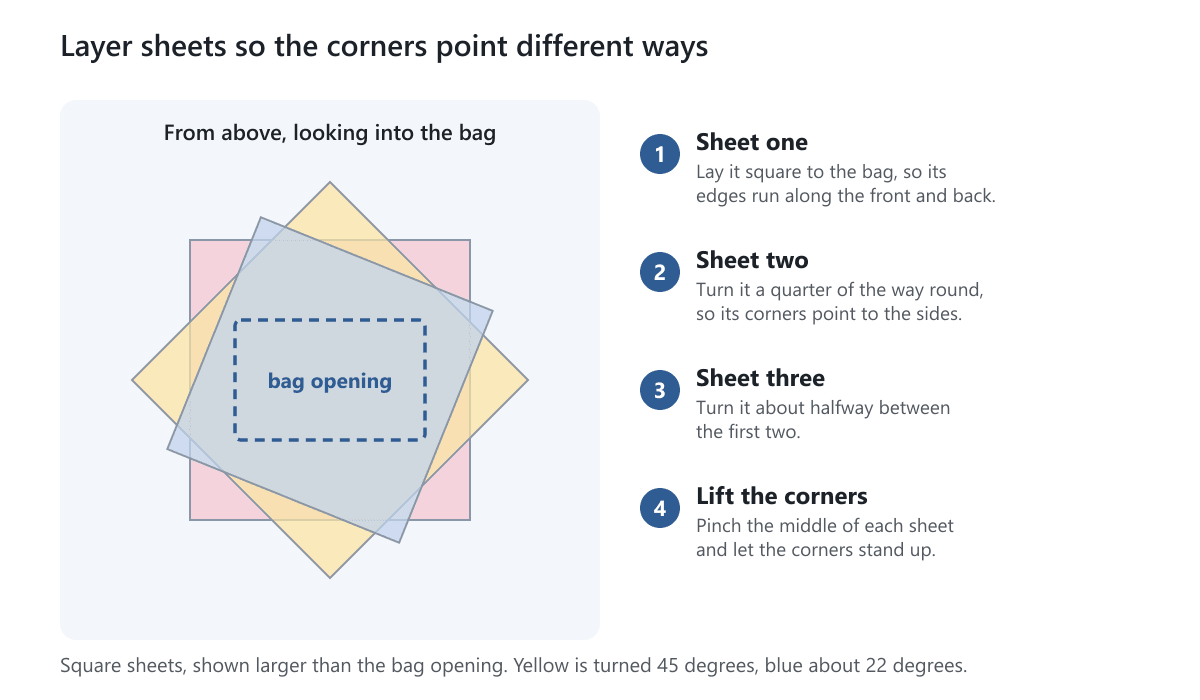
Hold a new sheet by its center and let the corners hang. Place it over the gift and turn it a little, so its corners point in different directions from the lining sheet. Press the middle down lightly.
5. Add One or Two More
Add another sheet, turning it again, and a fourth only if the top still looks thin. Each sheet should show a little of the one below it.
6. Fluff and Adjust
Pinch the center of the whole stack and gently lift it. Let the corners spread and stand up. Tuck any ends that droop into the sides, and step back to check that the top looks even. A gap on one side is usually fixed by pulling one corner across.
7. Finish With a Tag or a Ribbon
Tie the handles together with a ribbon, or tie a tag to one handle. Check that the tag is not hidden by the tissue.
Four Tissue Paper Styles to Copy
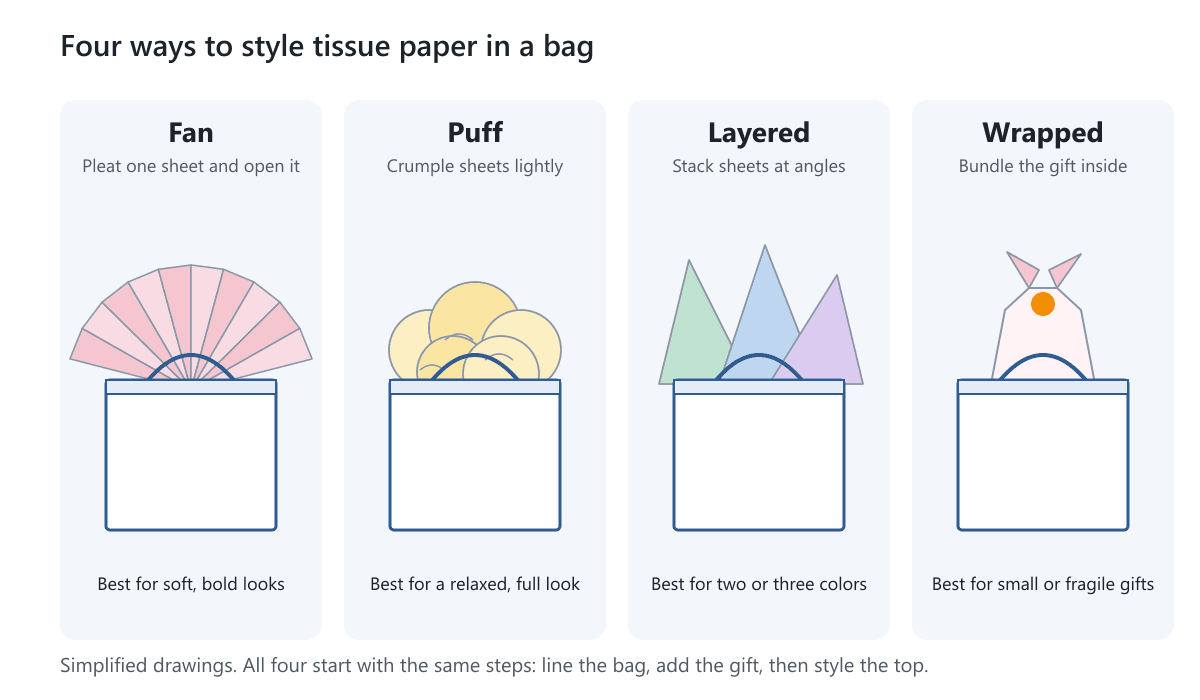
The basic method gives a classic layered top. These variations suit different gifts and moods.
Fan
Fold one sheet like a paper fan, in pleats about an inch wide, then pinch the middle and open the fan. Slide the pinched end into the bag so the fan spreads above the rim. It looks neat and works well on a single bold color.
Puff
Take two or three sheets and crumple them very loosely, then squeeze them into the bag so they form a soft cloud. This is the quickest style, and it hides oddly shaped gifts well. Do not crush the paper hard, or it will look creased and flat.
Layered
This is the basic method with three sheets in two or three colors, each turned so the corners point in a different direction. It suits birthdays, holidays and shop displays, because it looks full and takes little time.
Wrapped
Wrap the gift in a sheet like a small parcel, twist the top and seal it with a sticker, then stand it in the bag. A second sheet around the wrapped gift adds a hint of color. This is the best style for small or breakable gifts, because the tissue holds the gift firmly in the middle of the bag.
Choosing Colors
Color changes how the bag looks more than anything else you do. These rules keep it simple.
- Match the occasion. Red and green for winter holidays, pastels for baby showers and spring, white and gold for weddings.
- Match the bag. A kraft bag goes with white, cream, green or black tissue. A black bag goes with white, gold or a bright color.
- Use one color in two shades for a quiet, tonal look, or two contrasting colors for a bold one. Three or more colors rarely look good.
- Use white tissue for flexibility. It suits every gift and every bag, and it is easy to dress up with a tag or ribbon.
- Choose with the gift in mind. A dark gift shows through pale tissue, so use a darker sheet or two layers.
Dyed tissue can bleed color when it gets damp, so keep it away from wet items, and test colored tissue on a damp cloth if you are wrapping anything that may leak.
Fragile Gifts, Spills and Avoiding Mess
Tissue paper is light and thin, so it looks lovely but does not cushion. These steps keep gifts safe.
- Fragile items go in a box first. Glassware, ceramics and candles in jars need a rigid box or a padded wrap before the tissue. The tissue is only the top layer.
- Seal anything that can leak. Lotions, soaps, candles and bath products go in a pouch or a closed container.
- Do not let small items fall out. Put small gifts in a box or wrap them in a tissue parcel with a sticker. Loose items slip under the paper.
- Protect the handles. Keep the tissue away from the handle holes, so it does not catch or tear.
- Check the weight. A heavy gift in a thin bag will tear the bag, whatever is on top. See our guide to making a sturdy gift bag if you make your own.
If you ship gifts rather than hand them over, tissue is not enough: use a shipping box with an insert, as described in our guide to packaging inserts.
Folding and Fluffing Tips
- Store tissue flat. Creases from a tight fold show on the finished bag.
- Smooth old tissue. To reuse a sheet, flatten it under a heavy book for a day, or steam it gently with the iron held a few inches above. Test a small corner first.
- Use less than you think. Overfilling hides the gift and splits the sheets.
- Cut square sheets from a long one. A square sheet makes a more even corner pattern than a long rectangle.
- Shake each sheet out before you place it, to open up the corners.
Plain tissue is made of paper and is widely collected for recycling, but metallic, glittery or plastic-coated tissue usually is not. Rules differ by town, so check yours.
Pairing Tissue With the Bag, Box and Tag
The bag, the tissue and the tag should look like one set. Here is how to put them together.

- Bag first. Pick the bag, then choose tissue that suits it.
- Tag next. A tag in the same color family as the tissue ties the set together. Our guide to hang tags shows what a good tag can carry.
- A box inside the bag makes the gift look more finished. If you plan to give a box and a bag together, see where to buy gift boxes for ideas.
- One finishing detail such as a ribbon or a sticker is enough.
Common Mistakes
- Using one sheet only, so the top looks flat.
- Using five or more sheets, so the bag looks stuffed.
- Crushing the paper, so it looks creased.
- Letting the tissue cover the handles or the tag.
- Using pale tissue over a dark gift.
- Putting a fragile gift in tissue only.
- Mixing too many colors.
- Filling the bag past the point where it can close at the handles.
For Sellers: Branded Tissue Paper
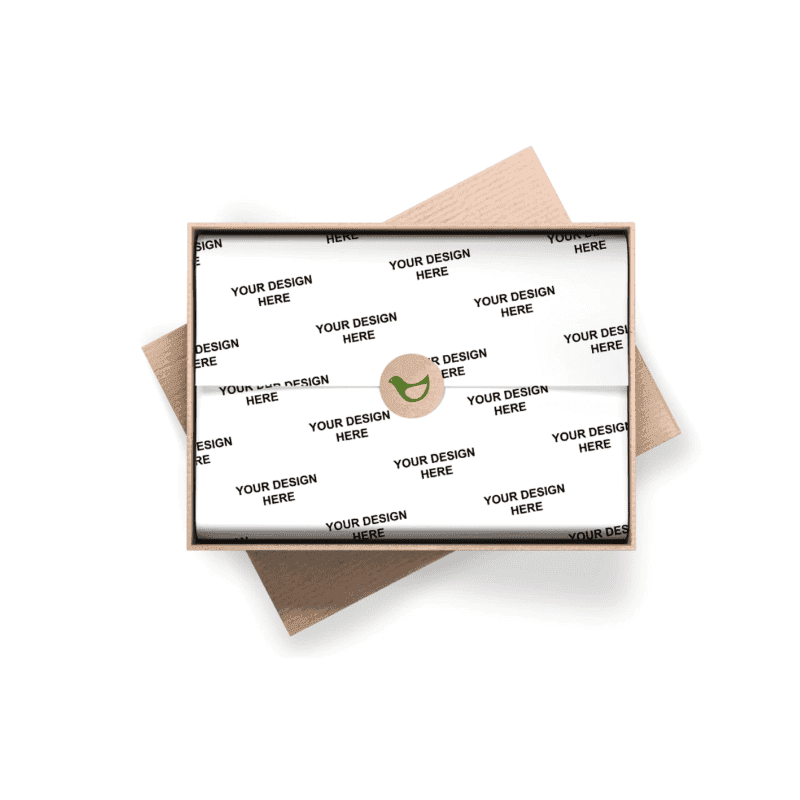
If you sell products, tissue paper is one of the easiest ways to make every order feel finished. A branded sheet covers the product inside the bag or box and shows your logo as soon as the customer opens it.
We make custom tissue paper in your size, printed with your artwork, and our free design support places your logo on the layout. A few points to think about:
- Pattern or single logo. A small repeat pattern shows your brand on every fold. A single logo near the middle looks clean but can fold out of sight.
- Show-through. Tissue is slightly see-through, so a dark product can show through a pale sheet. A sample helps you check.
- Sheet size. Wrap your largest product in a test sheet and measure it, so the sheet covers the item and overlaps in the middle.
- Closing the tissue. A round sticker with your logo seals the tissue and finishes the look.
- Pair it with the rest. Matching paper bags, a printed tag and tissue make one coordinated pack.
Tell us if the tissue will touch food, and we confirm suitable options. To order, send your size, quantity and artwork with a quote request, and we reply within 1 business day. The quote includes shipping to the US and Canada, and production starts after you approve the artwork and payment is received.
Quick Checklist
- Gift boxed or wrapped, and heavy items at the bottom.
- Lining sheet in the bag.
- Two to four sheets, each turned a little.
- Center pinched and corners lifted.
- Colors kept to two.
- Fragile or liquid gifts protected first.
- Tag or ribbon added last, and handles clear.
Frequently Asked Questions
How many sheets of tissue paper should I put in a gift bag?
Use two to four sheets for most bags. A small bag may need only one or two, and a large bag three or four. Add one at a time and stop when the top looks full but the bag can still close at the handles.
Do you put tissue paper in the bag before or after the gift?
Both. Put one lining sheet in first so the gift sits in a nest, set the gift in the middle, then add the remaining sheets on top. The lining sheet also hides the bottom of the bag.
How do you make tissue paper look fluffy in a gift bag?
Shake each sheet out before you place it, turn every sheet at a slightly different angle, and pinch the center of the stack before you lift the corners. Do not press or crush the paper, because that flattens it.
What colors of tissue paper go best with a kraft gift bag?
White, cream, green, black and soft pastels all work with kraft. Use one color in two shades or two contrasting colors, and avoid mixing more than that.
Can I use tissue paper to protect a fragile gift?
Not on its own. Tissue is thin and gives almost no cushioning. Put a fragile gift in a box or a padded wrap first, and use tissue as the decorative top layer.
How do I stop tissue paper falling out of the bag?
Use sheets large enough to be tucked into the sides, pinch the center so the stack holds together, and tie the handles with a ribbon. A wrapped bundle sealed with a sticker stays in place best.
Can I get tissue paper printed with my logo?
Yes. We make custom tissue paper in your size with your artwork, and free design support is included. Request a quote with your size and quantity.
Written by the PacksDo Team
We make custom printed packaging, from boxes and mailers to bags, labels and inserts. Questions about this guide? Ask us.