In this article
- 1Shipping Labels and Branding Labels: What Each One Does
- 2Brand Around the Label, Not Over It
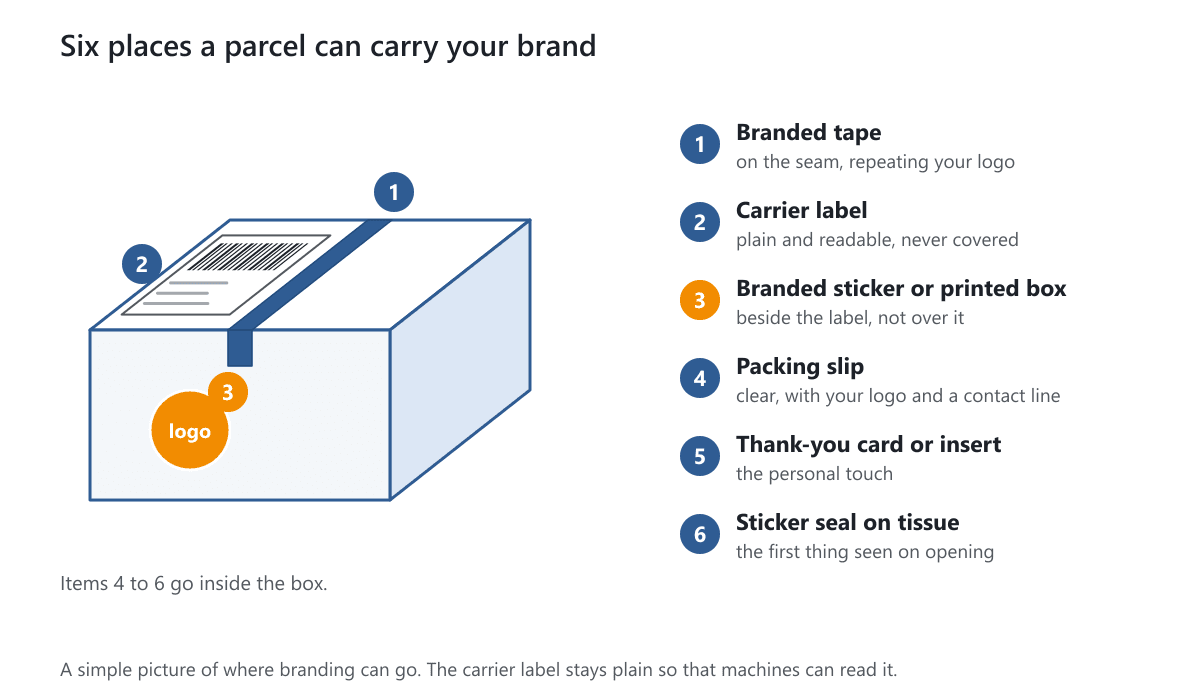
- 3Ways to Brand the Outside of the Box
- 4Branding the Inside
- 5Label Types and Printers
- 6Sticker Materials and Finishes for Branded Labels
- 7Barcode Legibility: What Makes a Scan Succeed
- 8Reduce Errors With a Routine
- 9A Packing Workflow for Small Sellers
- 10Common Mistakes
- 11Checklist
- 12Start With a Sample or a Quote
The shipping label carries the address and the barcode, so it should stay plain and easy to read. Put your branding around it instead: on a branded sticker, tape, the printed box, the packing slip and an insert. That way the carrier can scan every parcel, and the customer still sees your brand.
This guide is about the branding and efficiency side of labeling, which means label types, what can go on a label, printers, sticker materials, barcode readability and a packing routine for small sellers. If you want to know where to put the label on the box, see our guide to where to place a shipping label. Carriers publish their own rules and change them, so check your carrier's current requirements.
Key takeaways
- Keep the carrier label plain. The address and barcode come first. Brand the space around them.
- Use a brand zone. A small logo area at the top of the label, away from the barcode and address, is the safe place for branding on the label itself.
- Brand the parcel in other ways. Tape, stickers, a printed box, a packing slip and an insert all carry your brand without risking a scan.
- Choose materials for the job. Matte labels scan best. Glossy labels look vivid but can glare.
- Use a routine. The same steps in the same order cut mistakes more than speed does.
- Test the barcode. One scan before the parcel leaves catches most problems.
Shipping Labels and Branding Labels: What Each One Does
People use the word "label" for several different things. Keeping them apart makes it easier to brand without breaking anything.
| Item | What it is for | Brand it? |
|---|---|---|
| Carrier shipping label | Address and tracking barcode, read by people and machines | Only in a small brand zone |
| Branded sticker or label | Seals a flap, closes tissue, adds a logo | Yes, this is your main branding label |
| Branded tape | Seals the box and repeats your logo along the seam | Yes |
| Packing slip | Lists what is in the box | Yes, with a logo and a contact line |
| Insert or thank-you card | A personal note or product guide inside | Yes |
| Printed box | The box itself, printed with your design | Yes |
A "label" in this guide means the carrier label unless we say branded label. The next sections show how to brand around it.
Brand Around the Label, Not Over It
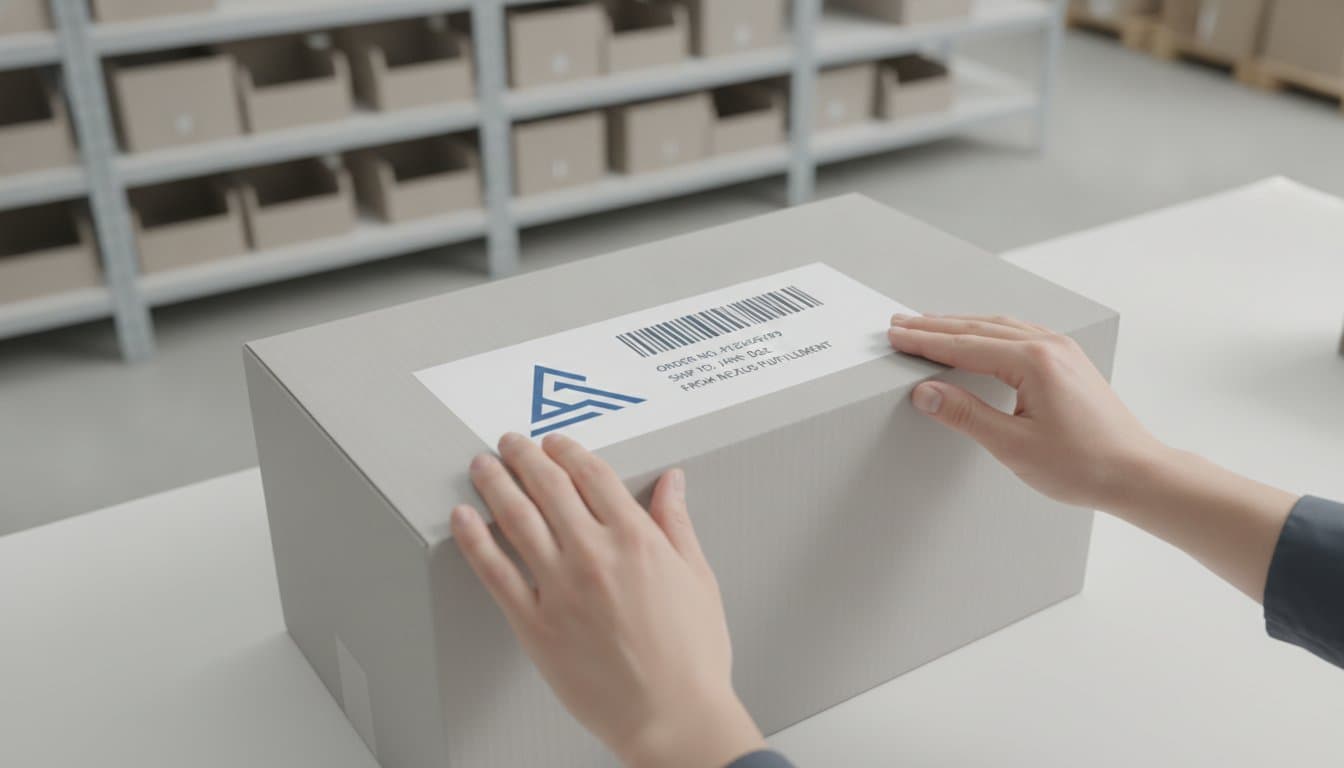
A carrier label has a job to do, and scanners and sorters depend on it. Many shipping tools let you add a small logo to the top of a label template. This is fine when it stays clear of the data.
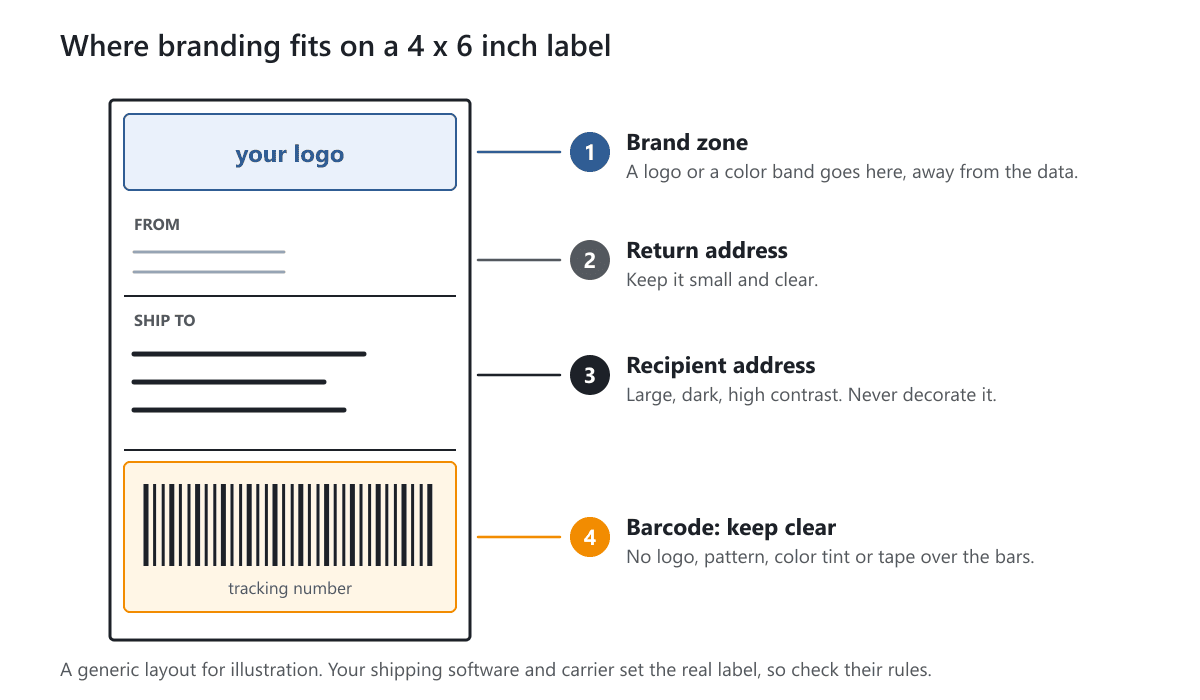
Use these guidelines on any carrier label:
- Logo zone at the top. Keep it small, and leave a clear margin between it and the return address.
- Never tint or pattern the barcode area. Bars need strong contrast, which means black on white.
- Do not decorate the recipient address. Large, dark, plain type is easiest to read.
- Do not print over the barcode. Logos, stamps and stickers over the bars can stop the scan.
- Check your carrier's rules. Some set limits on what you may change.
A common size is 4 x 6 inches, the standard thermal shipping label, but your carrier and shipping software decide the size you use.
Ways to Brand the Outside of the Box
- A printed box. A mailer box or shipping box printed with your logo needs no extra branding. Tell us where the label will go, and we leave a plain area for it.
- Branded tape. A repeating logo along the seam makes every parcel look like yours. See our custom tape.
- A branded sticker. A sticker next to the label, or sealing a flap, adds a logo to a plain box. See our stickers and labels.
- A branded bag. For soft goods, a printed poly mailer is a flexible shipping bag with your logo. See our poly mailers.
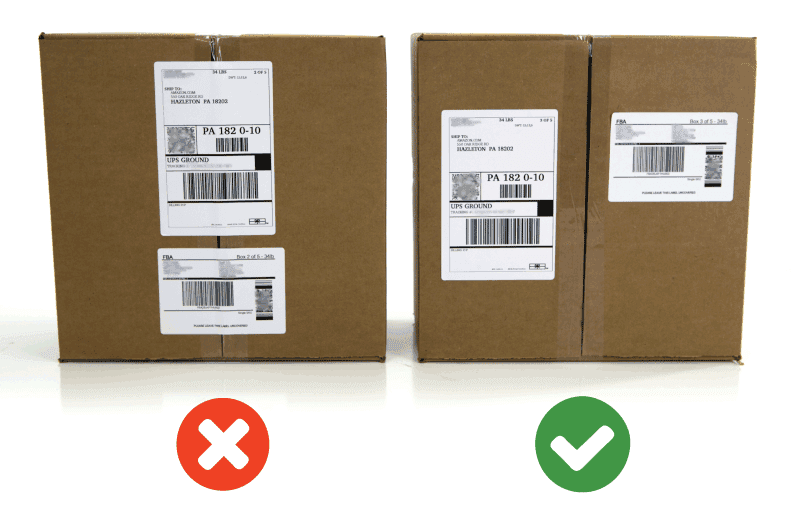
Placement matters: put branding beside the carrier label, never across it, and never across a seam where it will tear when the box is opened.
Branding the Inside
The unboxing starts when the customer opens the parcel. The inside is a safer place for branding than the label, because nothing there has to be scanned.
- A sticker seal on tissue. The first thing the customer sees on opening.
- A packing slip. Add your logo, a short thank-you and a contact line, in a clear layout.
- An insert or card. A thank-you note, a care guide or a reorder prompt. See our cards.
- A product insert. A shaped insert holds the item neatly and looks deliberate. See our box inserts.
Together, outside and inside branding make a layered experience: the tape and sticker on the outside, then the tissue seal, the card and the product.
Label Types and Printers
Two kinds of printer are common for shipping labels.
| Thermal printer | Inkjet or laser printer | |
|---|---|---|
| How it prints | Heat on special label stock, no ink | Ink or toner on paper or sheet labels |
| Strengths | Fast, sharp barcodes, no smudging, one label at a time | No special printer if you already own one |
| Weaknesses | Needs thermal label stock and a printer | Ink can smudge when wet, sheets waste paper |
| Suits | Daily or high volume shipping | A few parcels a week |
If you ship every day, a thermal printer usually saves time and gives a crisp barcode. If you ship a few parcels a week, a regular printer is fine, as long as the barcode prints dark and sharp and the label sticks firmly. Print at actual size, not scaled, so the barcode keeps its proportions, and avoid low ink or toner.
Sticker Materials and Finishes for Branded Labels
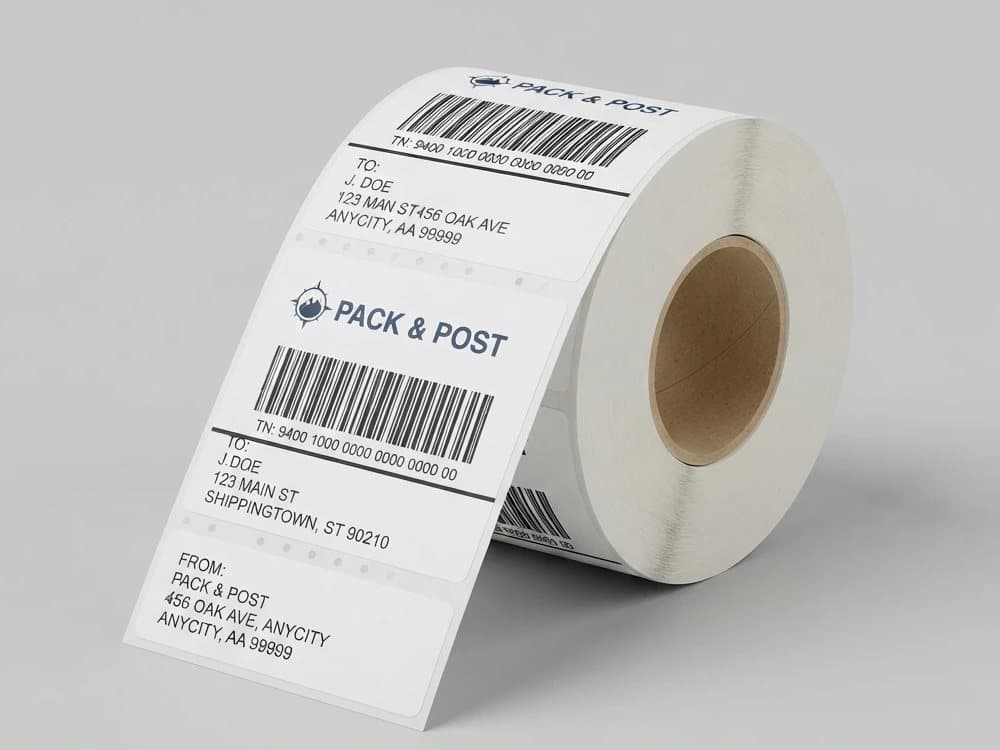
Your branded stickers and labels are separate from the carrier label, and they can be made from a range of materials. We make them on rolls and on sheets, from 500 units. Choose by how and where you use them.
| Material | What it is | Good for |
|---|---|---|
| White paper | Solid bleached sulfate (SBS) paper, 80 to 128gsm | Full-color logos on boxes and tissue |
| White vinyl | A white plastic film, also called PVC | Labels that may meet moisture or handling |
| Brown kraft | Natural unbleached brown paper, black or white printing only | A natural look on kraft boxes |
Finishes change the look:
- Matte: smooth and non-reflective, a soft look and easy to read.
- Glossy: reflective and vivid, though it shows fingerprints more.
- Satin: between matte and glossy.
- Soft touch: looks like matte with a velvety feel.
Ask us about a varnish or lamination for protection, and about other finishes. See our labels on roll and labels on sheets pages for the two formats. Rolls suit machine or fast hand application, and sheets suit small batches and hand use.
Barcode Legibility: What Makes a Scan Succeed
A barcode is just a pattern of dark and light bars, and a scanner reads it by comparing them. Anything that reduces contrast or blurs the pattern can cause a failed scan.
- Contrast. Dark bars on a light background. Avoid colored or textured backgrounds.
- Flatness. Wrinkles, bubbles and curves distort the bars.
- Glare. A high-gloss surface or shiny tape can reflect light into the scanner. Matte surfaces scan more reliably.
- Clear space. Leave empty space around the barcode. Do not place logos or text close to it.
- Print quality. Low ink, a worn print head or scaling blurs the bars.
- Size. Do not shrink the label unless your carrier allows it.
Scan a printed label once with your phone or scanner before you stick it on, and again before the parcel leaves. It takes a few seconds.
Reduce Errors With a Routine
Most labeling errors come from rushing, not from missing knowledge. A few habits help.
- One order at a time. Print the label and the packing slip together, then pack that order only.
- Match the name. Check the name on the slip against the name on the label before you seal.
- Void duplicates. If you reprint, destroy the old label so it does not end up on a second parcel.
- Check the address. Use address validation in your shipping tool if it has it, and read the address aloud once.
- Keep a reference. Put the order number on the slip, so you can find any parcel later.
- Do the scan check. Scan the barcode before the parcel leaves your hands.
For the placement rules, such as keeping the label off seams, see where to place a shipping label.
A Packing Workflow for Small Sellers
If you ship from a kitchen table or a small room, a simple fixed routine is all you need.
- 1. Prepare your station. Boxes, tape, stickers, inserts, a label printer and a scanner or phone within reach.
- 2. Print the label and the packing slip for one order.
- 3. Pack and seal. Add the insert and the sticker seal on the tissue, close the box and tape the seam.
- 4. Label. Stick the carrier label flat on one panel, away from the seam, and add any branded sticker beside it.
- 5. Scan check. Scan the barcode once, then place the parcel in your pickup bin.
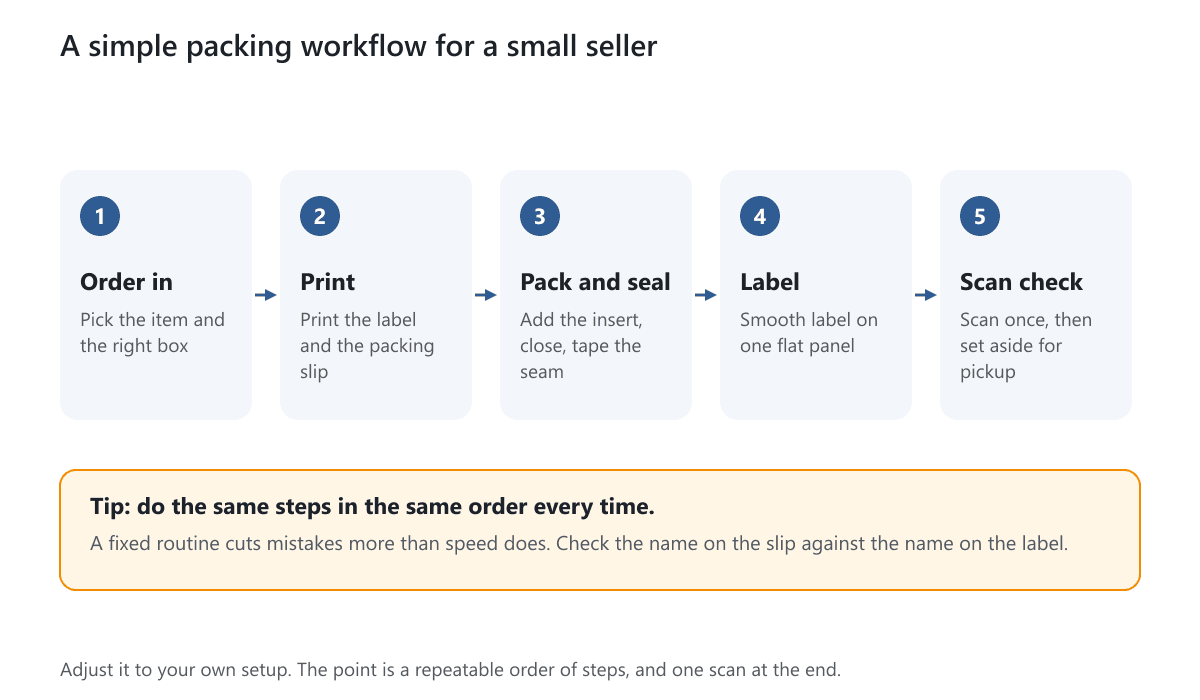
As you grow, the same routine works for a team. Write the steps down, and add one more rule: the person who packs checks the label, and a second person checks a sample. For how the size of the box affects shipping cost, see our guide to measuring a box correctly.
Common Mistakes
- Putting a logo or sticker over the barcode.
- Decorating or tinting the label area so contrast falls.
- Using glossy, reflective tape over a barcode.
- Branding the label heavily and skipping the inside of the box.
- Printing labels at a reduced size without checking.
- Leaving no plain, light area on a printed box for the carrier label.
- Not testing the barcode before it ships.
- Ordering branded stickers before checking they stick to your box surface.
Checklist
- The carrier label is plain, with the barcode and address clear.
- Branding sits in a logo zone, or on the tape, sticker, box, slip and insert.
- The barcode area has strong contrast, no glare and no wrinkles.
- You print at actual size with dark, sharp output.
- Branded stickers are matched to the surface and the use.
- You follow a fixed packing routine and scan once at the end.
- Your carrier's current rules have been checked.
Start With a Sample or a Quote
Before you order stickers, tape or printed boxes in quantity, test them on your real boxes. The Standard Sample Kit costs $50 with shipping included, and the samples page lists every sample type. You can plan the layout of a printed box with our free dieline templates.
When you are ready, tell us what you are branding and how you ship, and get a free quote. Design support is free.
Frequently Asked Questions
Can I put my logo on a shipping label?
Yes, in a small brand zone away from the barcode and address, if your carrier and software allow it. Never print or stick anything over the barcode.
Can I put a branded sticker on top of the shipping label?
Not over the barcode or the address. Put branded stickers beside the label, on the box seam or inside the box, so the label stays fully readable.
What size is a shipping label?
A common size is 4 x 6 inches, the standard thermal shipping label. Your carrier and your shipping software set the size you use, so check them.
Do I need a thermal printer for shipping labels?
No, but it helps if you ship daily. Thermal printers give sharp barcodes and no smudging. A regular inkjet or laser printer works for a few parcels a week if the barcode prints dark and sharp.
Should branded stickers be matte or glossy?
Matte is smooth, non-reflective and easy to read. Glossy is vivid but shows fingerprints and can glare. Keep the shipping barcode itself on a matte, non-reflective surface.
What is the minimum order for custom stickers and labels?
Our stickers and labels, on rolls and on sheets, start at 500 units. Each product page states its own minimum.
Is branded tape better than stickers?
They do different jobs. Tape repeats your logo along the seam and seals the box, and a sticker adds a logo in one spot or seals a flap. Many brands use both.
Written by the PacksDo Team
We make custom printed packaging, from boxes and mailers to bags, labels and inserts. Questions about this guide? Ask us.