In this article
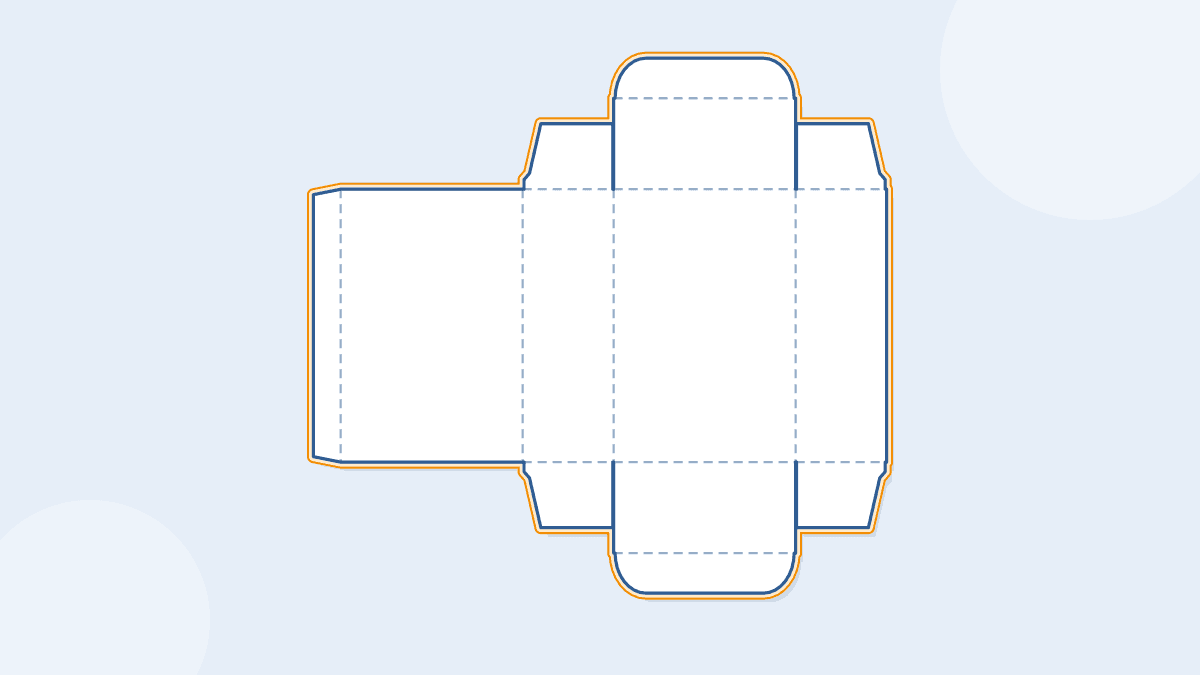
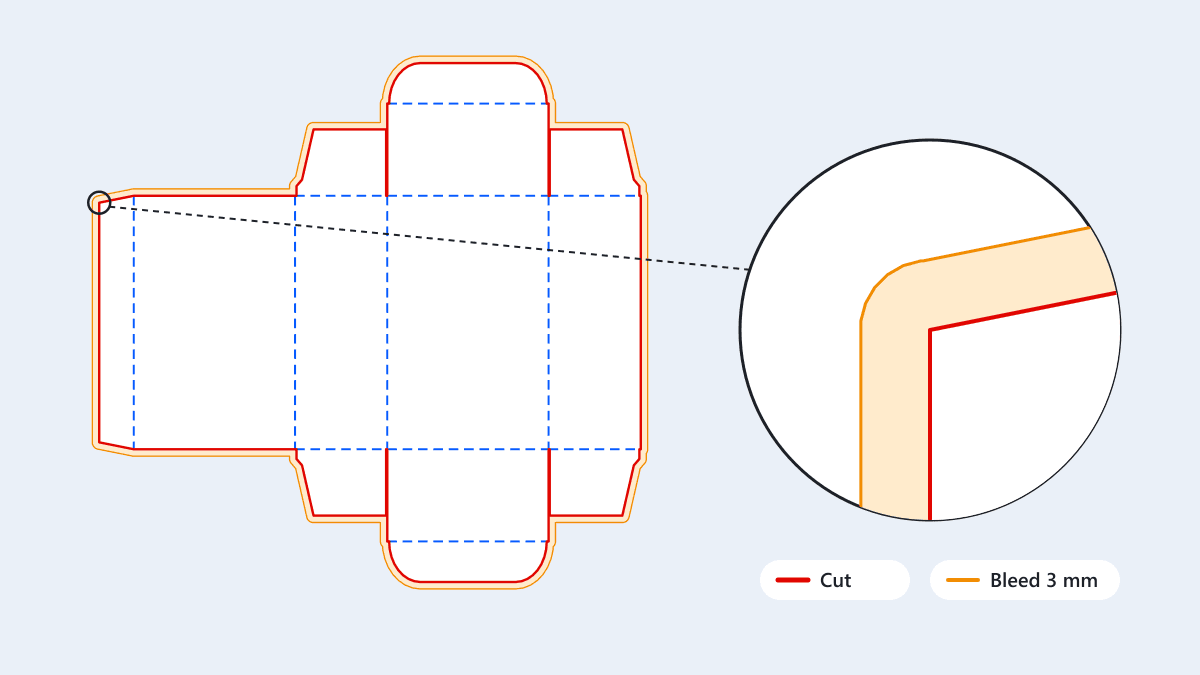
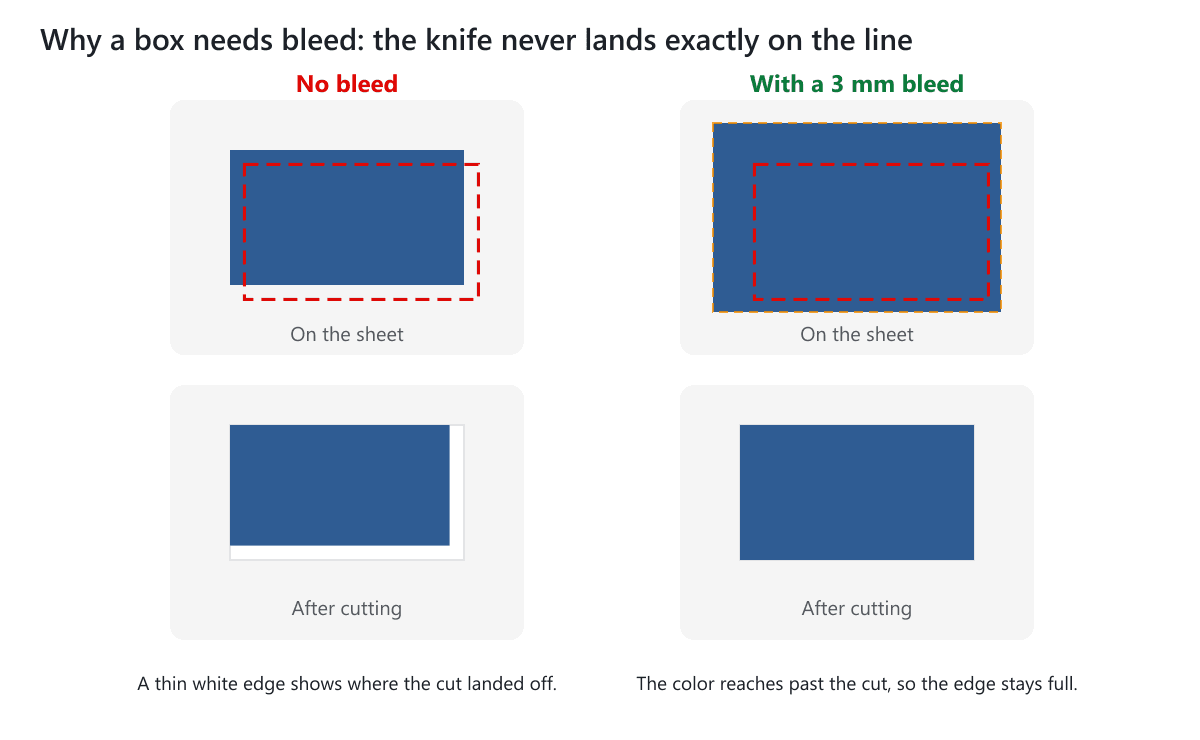
Bleed is the extra artwork you print beyond the cut line of a box, so the color or pattern still reaches the edge if the cut lands a little off. On a dieline it is drawn as a thin line, usually 3 mm outside the cut line. Without it, a small shift in cutting can leave a thin white edge on the finished box.
This guide explains what bleed is, why boxes need it, how much to use and how to set up your artwork with it. The pictures are drawn from our free dieline templates, which can add a bleed line for you.
Key takeaways
- Bleed is extra artwork past the cut line, so color reaches the edge even if the cut lands slightly off.
- 3 mm is the usual bleed; 5 mm suits larger boxes and thicker board.
- Keep text and logos inside a safe margin, about 3 to 5 mm in from the cut line.
- Extend backgrounds on every flap and tab, not only on the big panels.
- Use our free dieline templates to download a pattern with the bleed line already drawn.
What bleed means on a box
Printing and cutting are two separate steps. The sheet is printed first, then a cutting die cuts the box shape out and presses in the crease lines. The two steps never line up perfectly, so the cut can land a fraction of a millimeter to the left or right of where the artwork expects it.
Bleed is the safety margin that covers that gap. Your background color, pattern or photo runs past the cut line, and everything outside the cut line is trimmed away, so it never shows on the finished box. The word comes from the ink that "bleeds" off the edge.
Why boxes need bleed more than flat print
A flyer has four straight edges. A box has a long outline with flaps, tabs and curves, and then it is folded. That makes small cutting shifts easier to see:
- More edge to go wrong. Every flap, tab and curve is a place where the cut can drift away from the printed color.
- Folded corners show the edge. Once the box is creased and folded, the cut edges of flaps meet at corners and sides, so a white sliver is easy to spot.
- Board moves. Board can shift slightly as it is cut and creased, and thicker board such as corrugated can move more than thin paperboard.
- Solid colors and patterns hide nothing. A dark box with a thin white edge looks unfinished, and a pattern that stops short of the edge looks cut off.
The lines on a dieline
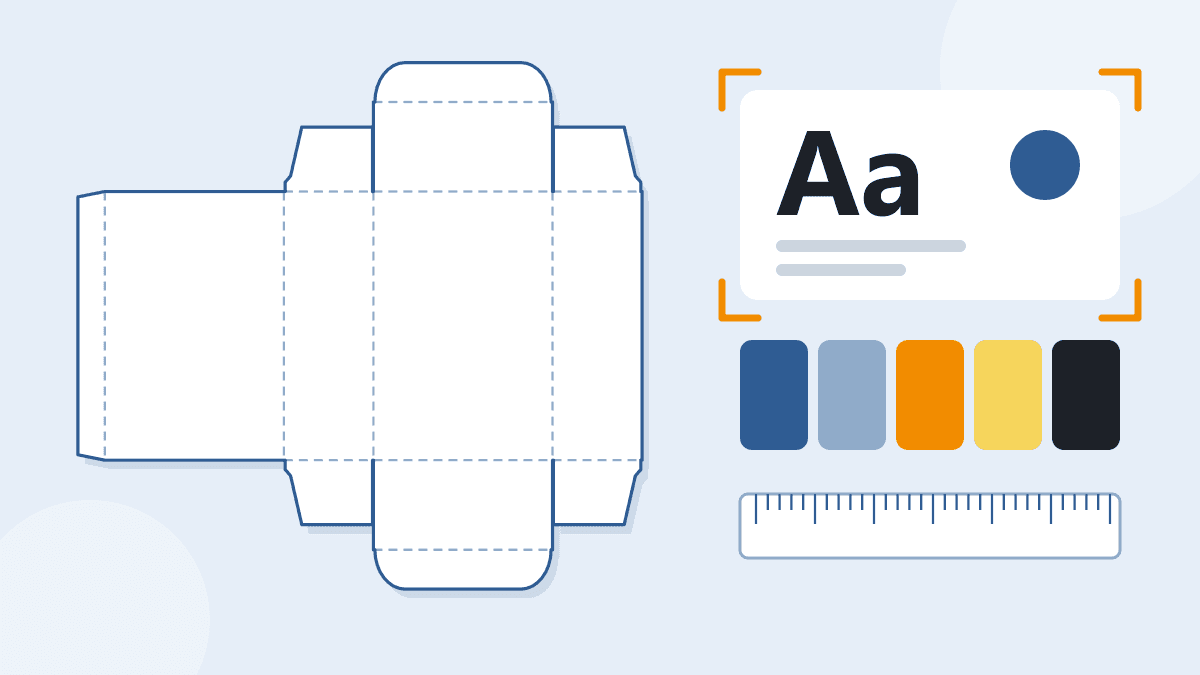
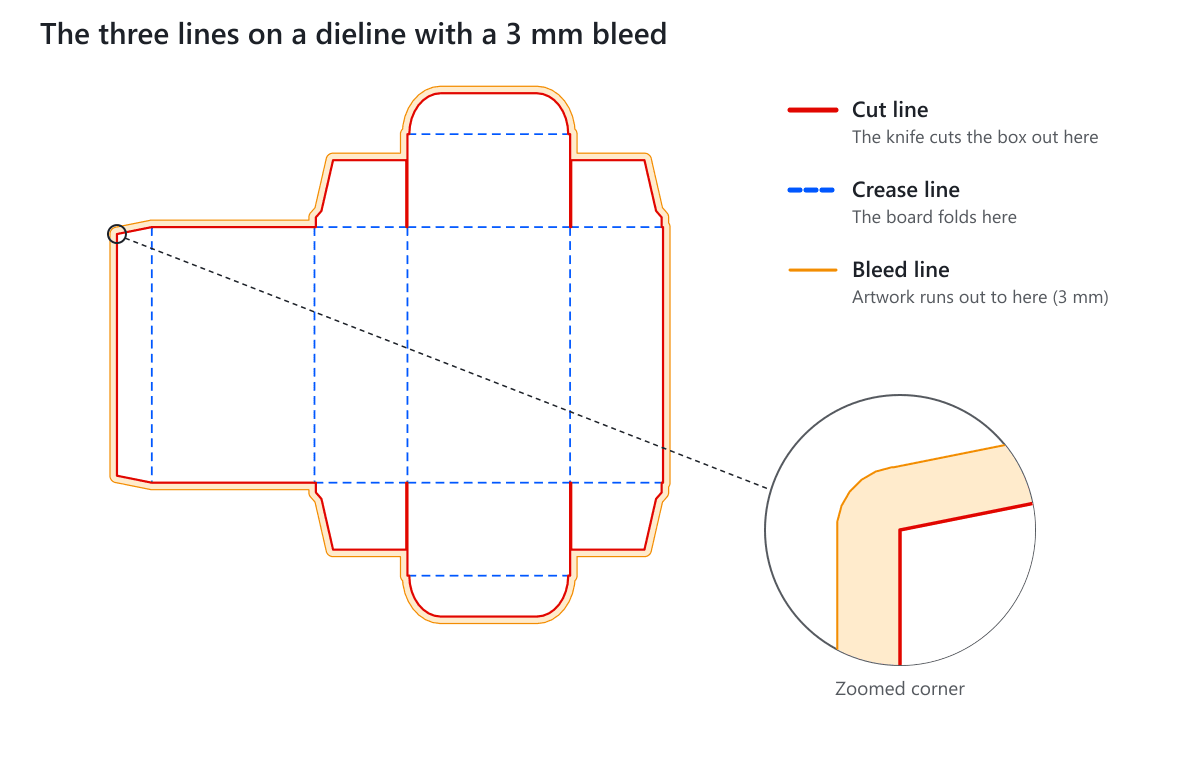
A dieline is the flat pattern of a box. It uses different line styles so the printer and the die maker know what each line means. Colors differ a little between companies, so always read the legend. In our templates:
- Cut line (red, solid): where the box is cut out of the sheet.
- Crease line (blue): where the board folds.
- Perforation (green, long dashes): small cuts where a part can tear out or bend easily, on the templates that have one.
- Bleed line (orange): how far your artwork should run beyond the cut line. It only appears when you choose a bleed.
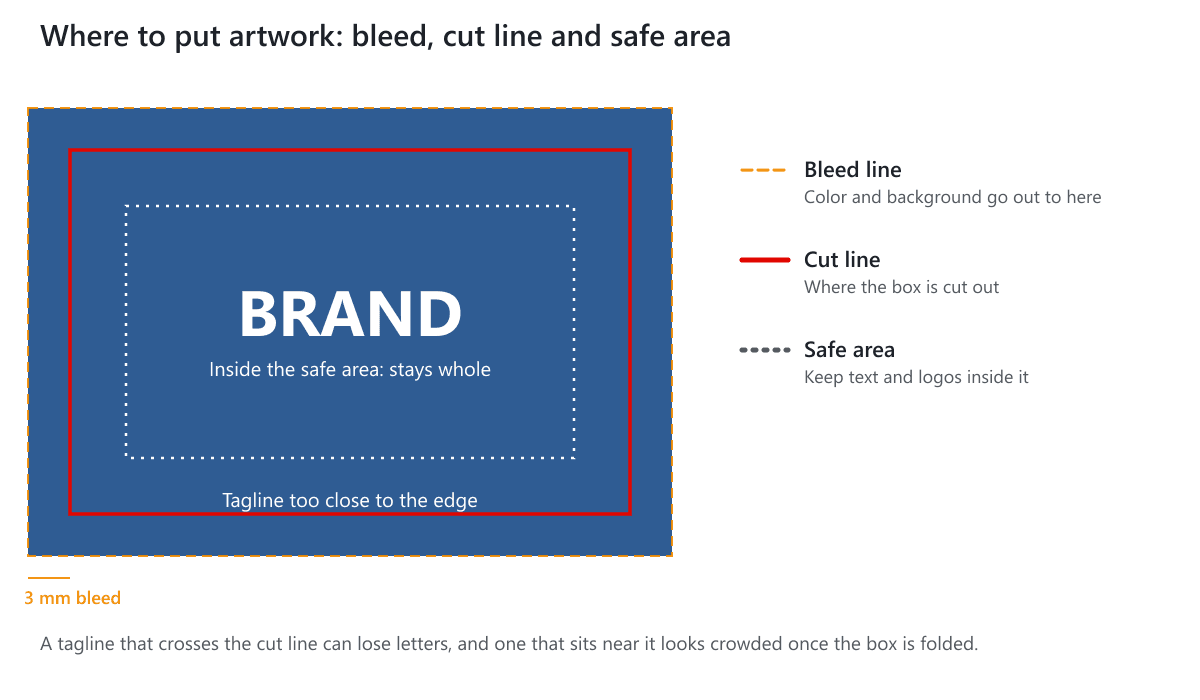
- Safe area: not a line in our templates. It is the margin inside the cut line where text and logos should stay, so measure it in yourself.
How much bleed do you need?
The most common bleed is 3 mm. Larger boxes and thicker board can need more, and 5 mm is the next size up. Printers ask for different amounts, so use the number you are given. When we make your box, we confirm the final dieline with you before printing.
| Bleed | When it fits | In our dieline tool |
|---|---|---|
| 3 mm | The usual choice for folding cartons, sleeves, tags and labels. | Choose "3 mm bleed" |
| 5 mm | Larger boxes, and thicker board such as corrugated mailers and shipping boxes. | Choose "5 mm bleed" |
| No bleed | Only when no color or image reaches the edge, for example a plain box with a logo in the middle. | Leave it on "No bleed" (the default) |
How to set up your artwork with bleed
Follow these steps in any design program that opens PDF or SVG files, such as Illustrator, Affinity, Inkscape or Figma.
- Get a dieline with the bleed already drawn. Open our free dieline generator, choose your box style, type your size, pick 3 mm or 5 mm in the Bleed list and download a PDF, SVG or DXF file.
- Keep the dieline on its own layer. In SVG and DXF files the cut, crease, perforation and bleed lines are on separate layers. In a PDF they are separate colors. Either way you can lock them and design on layers underneath.
- Run backgrounds and images out to the orange line, not just to the red cut line. Fill the whole area between them.
- Keep text, logos and barcodes inside a safe margin. About 3 to 5 mm inside the cut line is common, and keep small text away from crease lines.
- Check every flap and tab, not only the big panels. Tuck flaps, dust flaps and glue flaps are cut the same way and can show the same shift.
- Use sharp images. A photo should be about 300 dpi at its final size, because stretching a small image out to the bleed makes it blurry.
- Ask before you export. The dieline lines are for placing artwork and should not print, so hide them or send them as a separate file. Tell us which format you are using and we will tell you what we need.
Common bleed mistakes
- The background stops at the cut line. This is the classic white edge. Always extend color to the bleed line.
- Text sits right at the edge. Even a small shift can slice off letters or make the panel look crowded once folded.
- Only the main panels have bleed. The flaps and tabs need it too, on every edge that is cut.
- A small picture is stretched to fill the bleed. The edges look soft. Use a larger image or a solid color there.
- The artwork is reused for a different box size. Every size has its own dieline, so download a new one instead of scaling the old file. Our guide to measuring box dimensions shows how to get the size right first.
- The bleed is missing on one side. Check all four sides of each panel before you send the file.
Bleed on a curved or complex dieline
Bleed follows the whole outer shape, including curves and tabs. In our tool the line is built as an even margin around the cut outline, with rounded corners, so a mailer box with a round lid flap gets the same 5 mm all the way round. Slots and windows inside the shape do not get a bleed line.
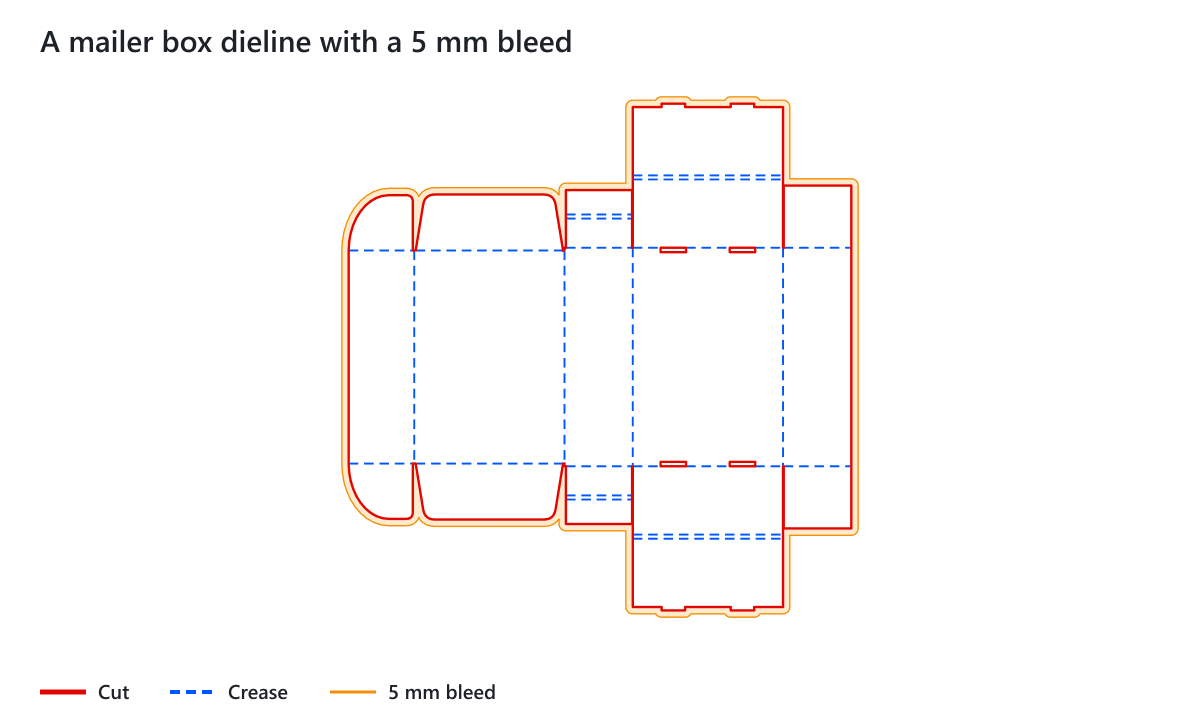
Try it on the straight tuck end dieline, the standard mailer box dieline or any other free template. Our packaging dieline guide explains the rest of the file.
What to do next
Choose your box type, download a dieline with the bleed you need and place your artwork on it. If you would like to see how a printed box looks cut and folded, you can order a Standard Sample Kit. Or tell us what you are making and we will recommend a box and confirm the dieline: get a free quote. You can also compare custom product boxes before you decide.
Frequently Asked Questions
What is bleed in packaging?
Bleed is the extra artwork printed beyond the cut line of a box. It makes sure color or pattern still reaches the edge if the cut lands slightly off, so the finished box has no thin white edge. On a dieline it is a line, usually 3 mm outside the cut line.
How much bleed should a box have?
3 mm is the most common bleed. Larger boxes and thicker board such as corrugated may need 5 mm. Use the amount your printer gives you. Our free dieline templates can draw a 3 mm or 5 mm bleed line, and we confirm the final dieline with you before printing.
What is the difference between bleed and safe area?
Bleed goes outward: artwork runs past the cut line so the edge is full. The safe area goes inward: text, logos and barcodes stay a few millimeters inside the cut line so the cut or the folds never touch them.
Does bleed go on every side of the dieline?
Bleed goes around the outside of the whole shape, flaps and tabs included, not only the big panels. Slots and windows inside the shape do not need a bleed line.
Can I download a dieline with bleed?
Yes. On any of our free dieline templates, type your size, choose "3 mm bleed" or "5 mm bleed" in the size panel and download the file as PDF, SVG or DXF. The bleed is an orange line on its own layer in SVG and DXF files.
Do I need bleed if my box is plain or one color?
If no ink or image reaches the edge, for example a plain box with a logo in the middle, you may not need it. A solid color that runs to the edge still needs bleed, because a small cut shift would show the plain board.
Written by the PacksDo Team
We make custom printed packaging, from boxes and mailers to bags, labels and inserts. Questions about this guide? Ask us.