In this article
- 1Why Mistakes Cost More the Later You Find Them
- 2Mistake 1: Guessing the Size
- 3Mistake 2: Skipping the Sample
- 4Mistake 3: Artwork That Is Not Ready for Print
- 5Mistake 4: Ordering Too Many, or Too Few
- 6Mistake 5: Choosing on Unit Price Alone
- 7More Mistakes and Quick Wins
- 8Budget Advice for Small Brands
- 9A Pre-Order Checklist
- 10Your Next Step
The five mistakes small brands make most often when ordering packaging are guessing the size, skipping the sample, sending artwork that is not ready for print, ordering the wrong quantity and choosing on unit price alone. Each one is easy to avoid if you know what to look for, and each one gets more expensive the later it is found.
This guide goes through the five mistakes with a fix for each, then a list of smaller mistakes that are quick wins, budget advice for small brands and a checklist to use before you order. The examples are invented to show how it plays out, and they are not real customers. For the full ordering basics, see what custom packaging boxes are.
Key takeaways
- Measure the product with its wrap and insert, and add a little clearance. Do not guess the box size.
- Test a sample before the full run. It is the cheapest way to find a fit or finish problem.
- Build artwork on the dieline with bleed, vector logos and high-resolution images.
- Order for a few months of sales, not the lowest price per box. A design can change.
- Compare the full cost: shipping, setup, proofs, storage and reorder, not only the price per box.
- Approve a proof, and leave a buffer in your schedule.
Why Mistakes Cost More the Later You Find Them
Packaging is made in steps, and each step locks in the one before. A wrong size on paper is a change of a number. A wrong size after printing is a new print run.
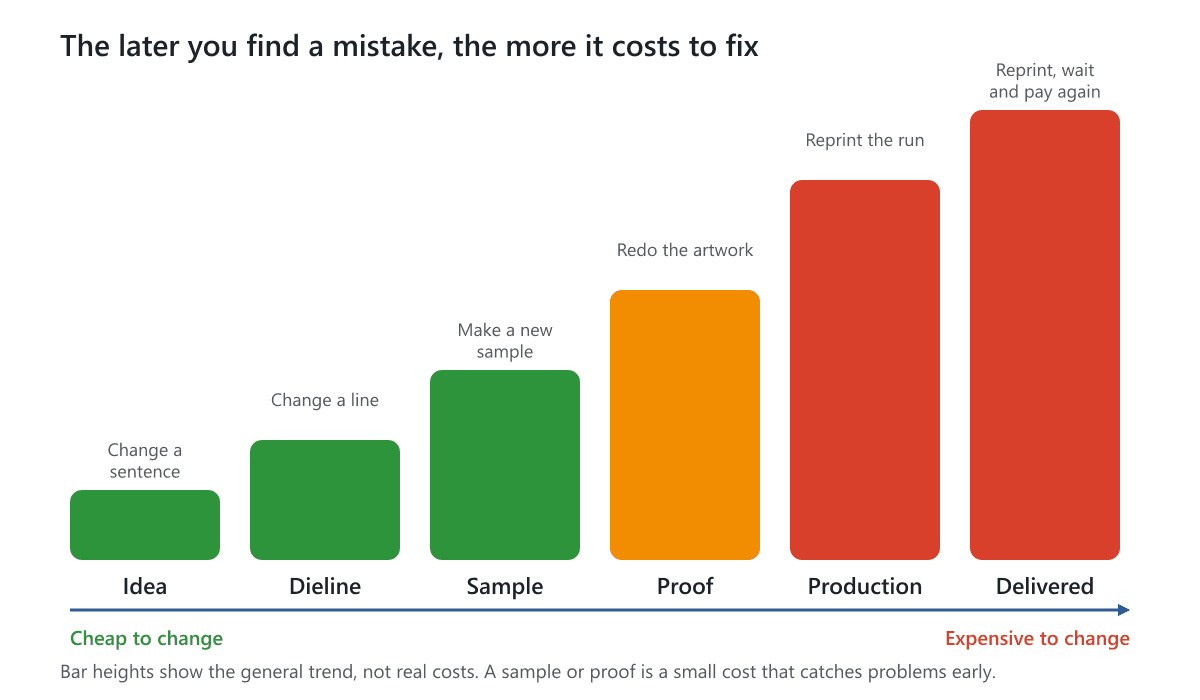
That is the idea behind everything in this guide. Check early, check cheaply and check before you print.
Mistake 1: Guessing the Size
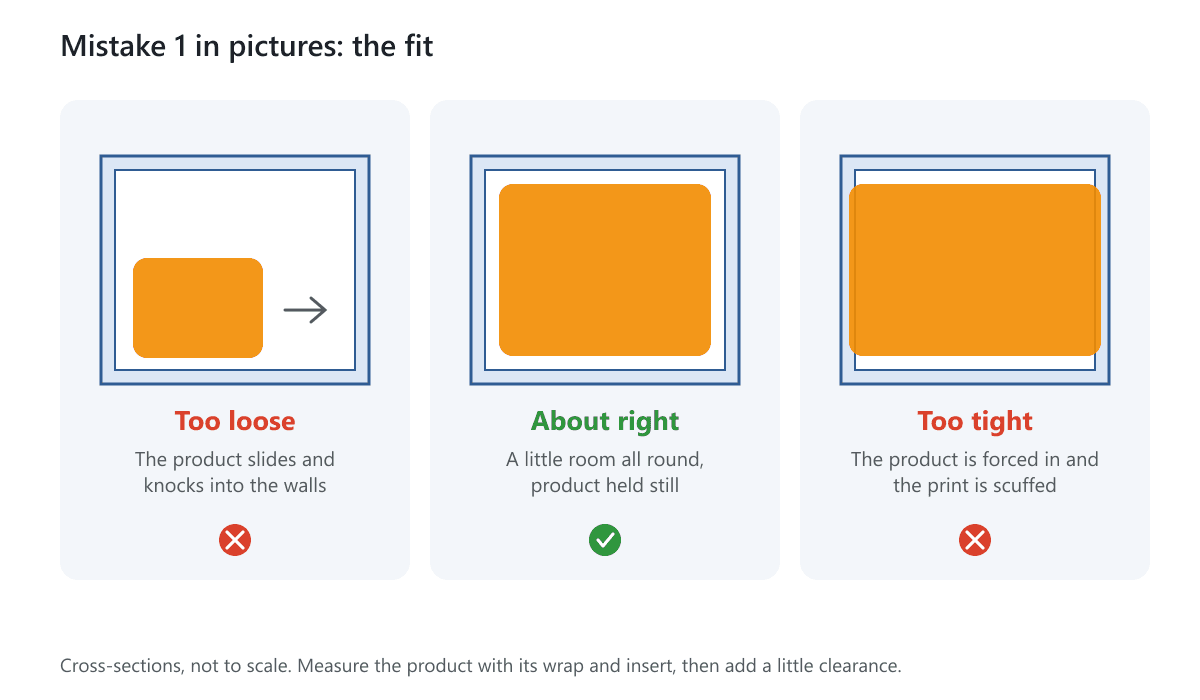
Size problems are the most common reason a box does not work. A box that is too loose lets the product slide and get damaged. A box that is too tight forces the product in, scuffs the print and can burst a seam.
How It Happens
- Measuring the product without its wrap, cap, tag or label.
- Forgetting the insert, tissue or cushioning that will go in the box.
- Giving an outside size when the box is built from the inside, or the other way round.
- Measuring only one unit of a product that varies a little.
- Leaving no clearance, so the product has to be forced in.
How to Avoid It
Measure the product as it will be packed. Measure three units and use the largest numbers. Give the inside dimensions, written length x width x height, and say that they are inside dimensions. Leave a few millimeters, about 1/8 inch, on each side as a starting point, and more for fragile items. Our guide to measuring the dimensions of a box correctly covers inside and outside sizes, board thickness and clearance.
Here is an example. A candle jar measures 100 x 70 x 30 mm. A box ordered at exactly 100 x 70 x 30 mm inside leaves no clearance, and the label rubs on every pass. A box ordered at 104 x 74 x 34 mm inside slides in and holds the jar still.
Mistake 2: Skipping the Sample
A sample feels like an extra cost and an extra delay, so small brands often skip it. It is the cheapest insurance in the process. A sample shows the real size, the feel of the board, how the closure works and whether the product fits.
What a Sample Catches
- A fit that was a few millimeters off.
- A tuck or lid that opens too easily or is hard to open.
- A board that feels too thin or too heavy for the product.
- A color or finish that looks different in your hand than on screen.
How to Avoid It
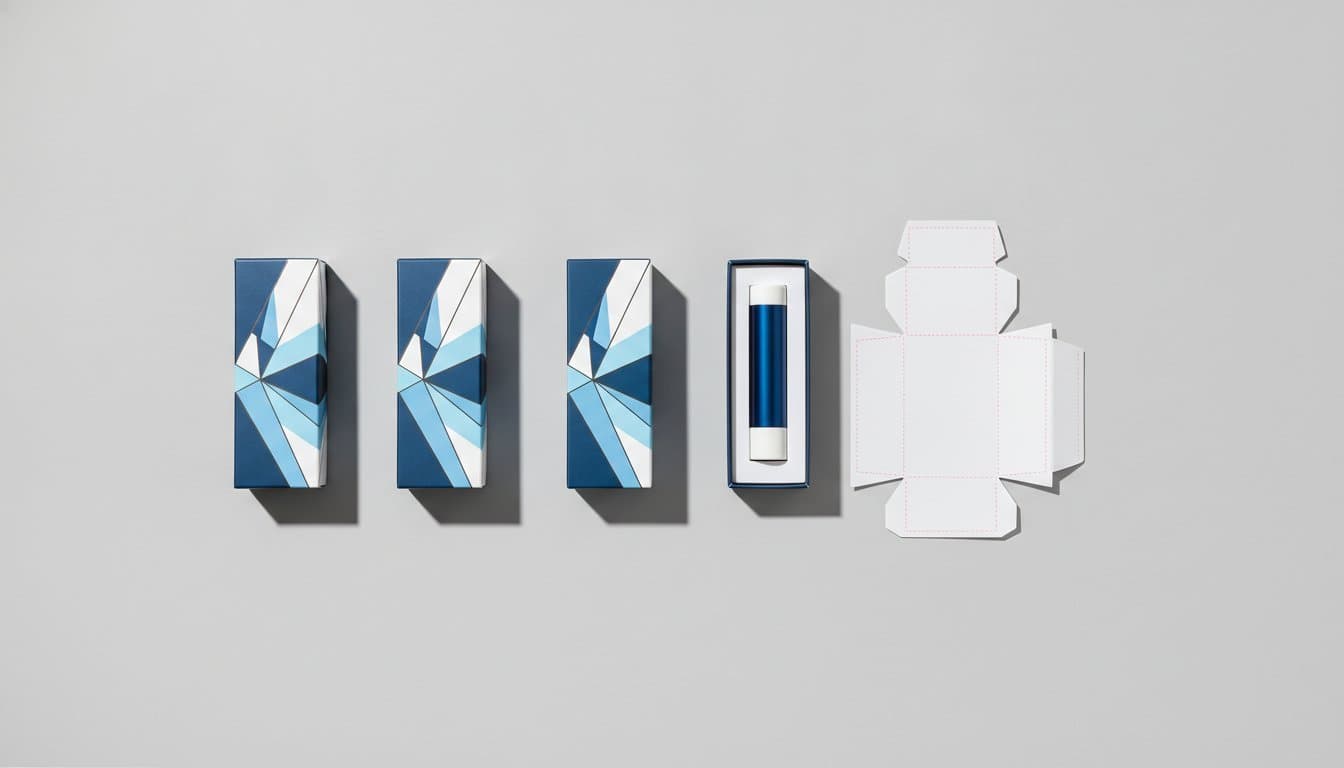
Order a structural sample, which is an unprinted prototype that shows size and form, before a full run. A printed proof or sample shows color and finish on the real board. The Standard Sample Kit costs $50, shipping included, and may not include rigid boxes or boxes that ship assembled. The samples page lists every type.
When the sample arrives, test it with the real product. Open and close it ten times, pack it as you would ship it, and try a few drops from waist height. Look at it on a shelf, or in a photo, from a few steps away.
Mistake 3: Artwork That Is Not Ready for Print
Good design on a screen can still print badly. The most common causes are simple and fixable.
| Problem | What goes wrong | The fix |
|---|---|---|
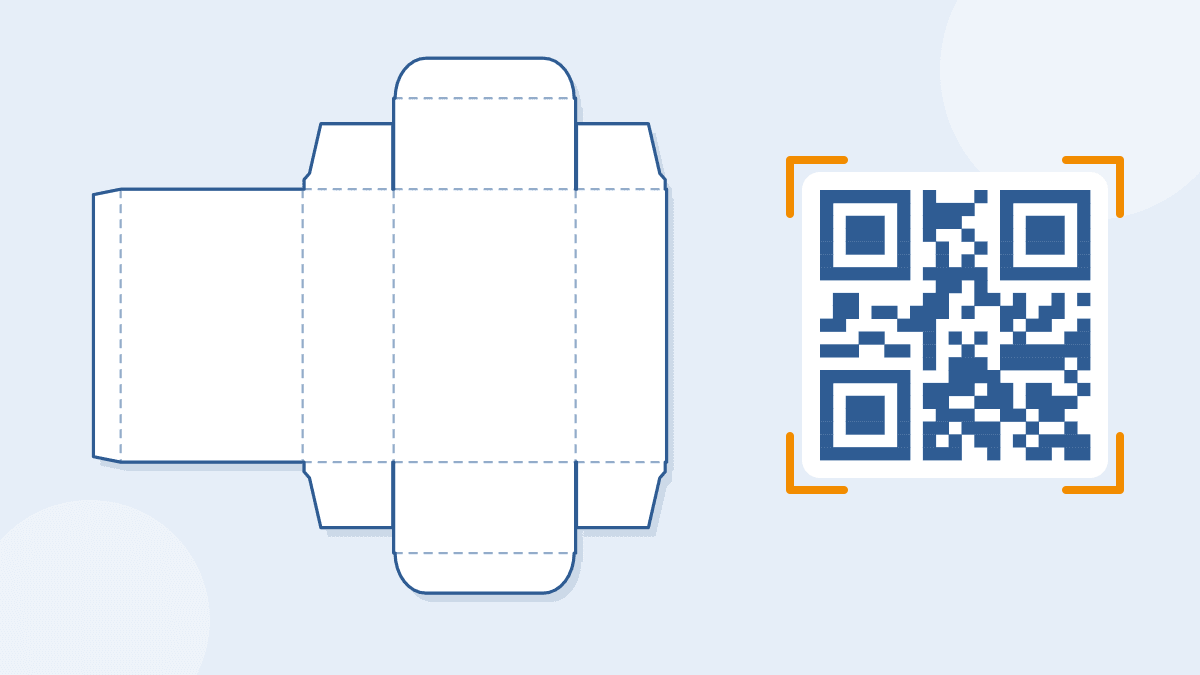
| Artwork not on the dieline | A logo lands on a fold or too close to an edge | Download the dieline template and build on it. See dielines |
| No bleed | A thin white edge shows if the cut shifts | Extend color and images past the cut line. See what bleed is |
| Low-resolution images | Photos print blurry or blocky | Use images that are about 300 dpi at the size they will print |
| Bitmap logo | Edges look soft and cannot scale | Use a vector file, such as SVG, PDF or AI |
| RGB colors | Bright colors print duller than on screen | Work in CMYK and use Pantone for key brand colors. See choosing colors |
| Live fonts | The printer's computer lacks your font, so it changes | Convert text to outlines, or send the fonts |
| Tiny text | Small print is unreadable, especially in reverse | Keep small text dark on light, and test at actual size |
If you are not sure whether your file is ready, send it to us. We include free design support, and we confirm the final dieline with you before printing. Our free dieline templates do not compensate for board thickness, so we check that on the final dieline.
Mistake 4: Ordering Too Many, or Too Few
Quantity is a balancing act. Larger runs usually cost less per box, because setup is shared across more boxes. But a big run ties up cash, takes storage space and locks in a design that may change.
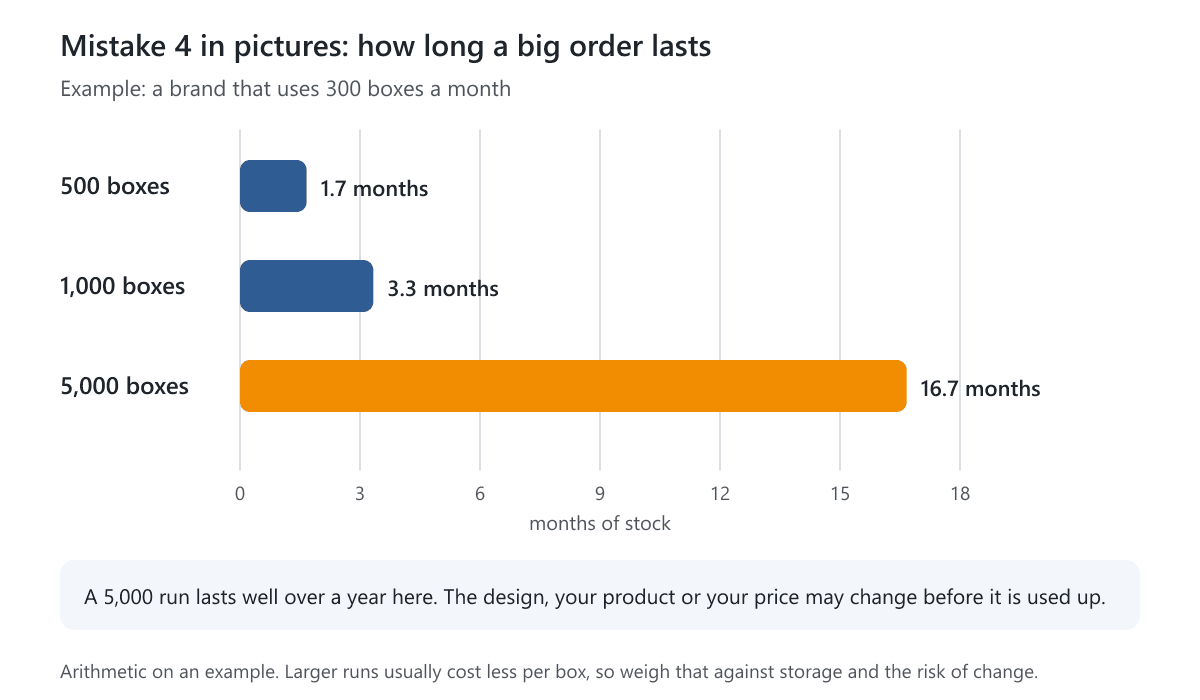
In the example, a brand that uses 300 boxes a month would need 5,000 boxes for almost a year and a half. In that time its product, its logo or its price could change. A first run of 500 to 1,000 gives it two to three months to learn, and the next order can be better.
How to Avoid It
- Count in months of sales, not in boxes. Aim for a first order of a few months.
- Check the minimum. Minimums depend on the product, and each product page states its own. Most of our box types start at 50 or 100 units, rigid boxes have a low minimum and shipping boxes start at 50.
- Think about shelf life. Paper boxes keep well in a dry place, but design trends and promotions do not.
- Do not order too few either. If you run out before the next order arrives, you may pay for a rush order or ship in plain boxes. Production takes 5 to 7 working days after approval and payment, plus delivery. Larger or more complex orders can take longer, and we confirm the date in your quote.
Our guide to the impact of packaging costs on product pricing shows how quantity changes cost per box.
Mistake 5: Choosing on Unit Price Alone
The price per box is easy to compare, so it gets compared first. It is rarely the whole cost. Two quotes with the same unit price can differ by a lot once everything else is added.
| Cost to check | Why it matters |
|---|---|
| Shipping | Some quotes add it later. Ours include shipping to the US and Canada, and taxes and duties are not included |
| Setup or plates | A one-time cost spread over the run |
| Proofs and samples | Needed before a full run |
| Storage | Assembled boxes take much more room than boxes that ship flat |
| Damage and returns | A weak box that fails costs more than a stronger one |
| Reorder cost | Will the next order cost the same, and is the file kept? |
| Time | A late delivery can miss a launch or a season |
The cheapest option on paper may also be the wrong one: a thinner board that crushes in transit, a color that does not match your brand or a structure that is hard to assemble. Compare quotes line by line, and ask what each includes. See the starting price on each product page, then get a quote for your exact specification.
More Mistakes and Quick Wins
These are smaller mistakes, but they appear often. Each has a quick fix.
- Skipping the proof. Approve a proof of the artwork before the full run. A color or a typo is cheap to fix on a proof and expensive on 1,000 boxes.
- Ignoring shipping and storage. Work out where empty and full boxes will sit, and whether they ship flat. A box that ships flat saves space until you assemble it.
- Forgetting the schedule. Add time for samples and artwork changes, and add a buffer before the date you need the boxes.
- Not saying how it will be used. Tell us if the box will be shipped, stacked, filled by machine or used for food or skincare. It changes the structure and board.
- Copying a larger brand. A style that suits a big brand with a large budget may not suit a small run. Start simple.
- Adding every finish. Foil, embossing and spot UV are effective in small doses. One strong detail usually does more than five.
- Leaving required text to the end. Check ingredients, warnings and the barcode early. You are responsible for the text on the pack.
- Ordering a rigid box when a carton would do. Match the structure to the product. See our guide to choosing the right box for your product.
Budget Advice for Small Brands
You do not need to spend a lot to have good packaging. These are steps that stretch a small budget.
- Start with a simpler structure. A paperboard tuck box usually costs less than a rigid box and works for many products.
- Print one or two colors. A strong one-color design on white or kraft board looks clean and keeps cost down.
- Spend where people look. Put the effort into the front of the box and the first impression, not into every surface.
- Use one box for several products. A single box size with a sticker or label that changes by variant lets you order more of one box.
- Add a branded extra to a plain box while you build up. A sleeve, tag or sticker adds brand cheaply. See packaging sleeves and hang tags.
- Plan the reorder. Keep your files and a sample from the first run. Reorders are faster when nothing has to be redone.
- Add finishes as sales grow. You can add foil or inside print later. The cost then comes from income, not savings.
A Pre-Order Checklist
- I measured the product with its wrap and insert, in one unit.
- The size I gave is the inside size, and I said so.
- I added a little clearance, and more for fragile items.
- I tested a sample with the real product.
- My artwork is built on the dieline with bleed.
- My logo is a vector file, and my images are high resolution.
- My colors are in CMYK, with Pantone for key brand colors.
- I approved a proof.
- My quantity covers a few months, and I checked the minimum.
- I compared the whole cost, not only the unit price.
- I know where the boxes will be stored.
- My schedule has a buffer, and delivery time is added on top of production.
Your Next Step
Pick the one mistake above that worries you most and deal with it first. For most small brands that is the size or the sample. Measure the product, try your size on a free dieline template, and order a sample. When you are ready, get a free quote. We include free design support, reply within 1 business day, and are happy to talk through the order with you. If you are preparing a launch, our guide to designing packaging for a new product puts the steps in order.
Frequently Asked Questions
What are the most common packaging mistakes small brands make?
Guessing the box size, skipping the sample, sending artwork that is not print-ready, ordering the wrong quantity and choosing only on unit price. Smaller mistakes include skipping the proof, ignoring storage and leaving no time buffer.
How do I avoid ordering the wrong box size?
Measure the product as it will be packed, with its wrap and insert. Measure three units and use the largest numbers. Give the inside dimensions in the order length, width, height, add a little clearance and test a sample.
Do I really need a sample before ordering?
It is strongly worth it. A sample shows fit, feel and closure before thousands of boxes are printed. A structural sample is an unprinted prototype, and the Standard Sample Kit costs $50, shipping included.
What is bleed and why does my artwork need it?
Bleed is a small extra area of color beyond the cut line. It makes sure no white edge shows if the cut shifts slightly. Extend backgrounds and images past the cut line. Our guide to what bleed is shows how.
How many boxes should I order the first time?
Order about two to four months of sales if the minimum allows it. Minimums depend on the product, and each product page states its own. Most of our box types start at 50 or 100 units, rigid boxes have a low minimum and shipping boxes start at 50.
Why is the cheapest quote not always the best?
The unit price leaves out shipping, setup, proofs, storage, damage and reorder costs, and the board or print may be weaker. Compare the full cost and what each quote includes. Our quotes include shipping to the US and Canada.
How can I save money on packaging as a small brand?
Choose a simple structure, print one or two colors, spend on the front of the box, use one box size for several products and add branded extras such as stickers or sleeves. Add finishes as sales grow.
Written by the PacksDo Team
We make custom printed packaging, from boxes and mailers to bags, labels and inserts. Questions about this guide? Ask us.