In this article
- 1What a Tuck Box Is and Where It Fits
- 2The Five Tuck Styles
- 3Straight or Reverse? How to Decide
- 4Closures and Features That Change How a Box Works
- 5Sizing a Tuck Box
- 6Materials and Finishes for Tuck Boxes
- 7Artwork Tips for Tuck Boxes
- 8Tuck Box Ideas by Industry
- 9Tuck Box or Another Style?
- 10Shipping and Protecting Tuck Boxes
- 11Common Mistakes
- 12Next Step
A tuck box is a folding carton that closes with a flap that tucks into the box. The two common versions are the straight tuck end (STE) and the reverse tuck end (RTE). For heavier products, a lock bottom such as an auto lock (crash lock) or snap lock bottom is usually the better choice.
This guide explains how each tuck style works, how to choose between them, which closures and features are worth adding, how to size and print a tuck box, and which products suit which style. It is about tuck boxes only. For the wider family of cartons, see our guide to folding cartons. For measuring, use the size guide. For board and finishes, read the paperboard guide.
Our tuck boxes page lists every style and feature, and each style has its own page.
Key takeaways
- Tuck boxes are paperboard cartons. We make them from white or kraft board, typically 300 to 400gsm, and they start at 100 units.
- Straight and reverse tuck end differ in flap placement. The body size is identical. Reverse tuck often uses the printing sheet more efficiently.
- Heavier products need a lock bottom. Auto lock and snap lock bottoms are made for more weight than a simple tuck end.
- Closure features decide how it feels. Friction fit, slit lock, thumb cutout, window and hang tab each solve a different problem.
- A tuck box is not a shipping box. Pack it inside a shipper or a mailer.
What a Tuck Box Is and Where It Fits
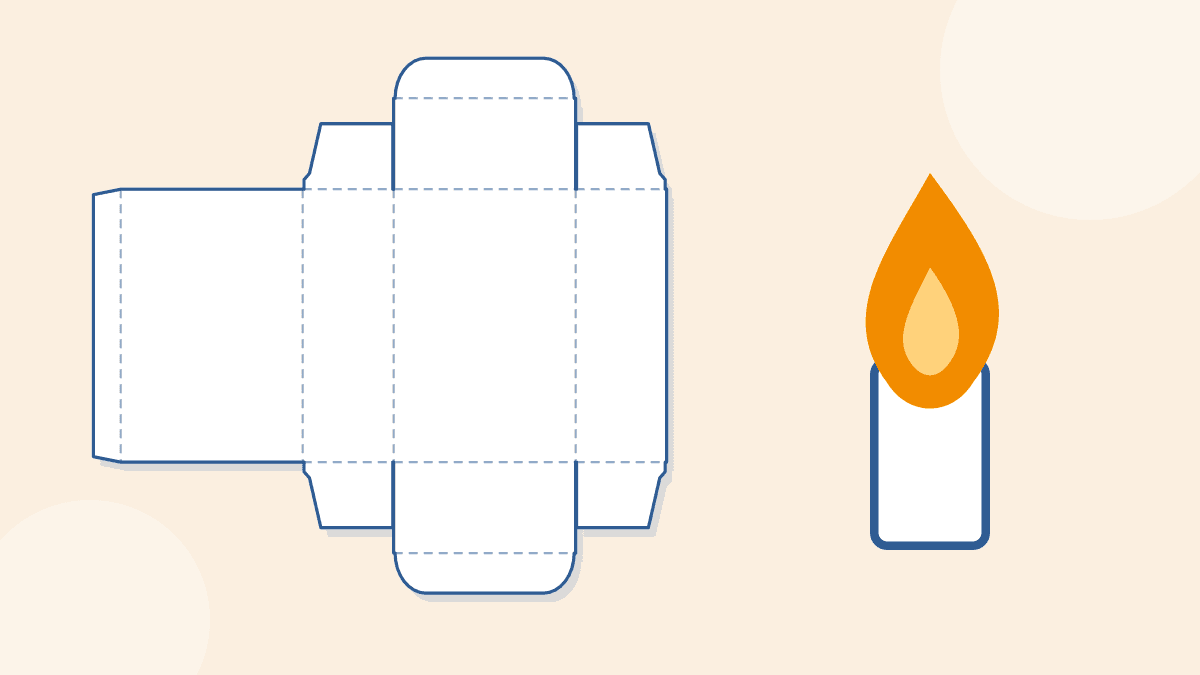
A tuck box has four main panels that form a tube, plus a flap at each end. The flaps fold in, and a tuck tab slides into the box to hold it shut. Small dust flaps on the sides of the tuck keep the gap closed. A narrow glue flap joins the side seam.

Tuck boxes are light, flat to ship and cheap to assemble, which is why they are so common for cosmetics, supplements, snacks, small electronics and retail goods. Our product page says they can be made with corrugated materials for added strength, and they can have double tuck ends for dual access or one end sealed, glued or locked.
They are retail packaging. Our tuck box styles ship flat and need some assembly, and the style pages say a shipping carton is strongly recommended for transit.
The Five Tuck Styles
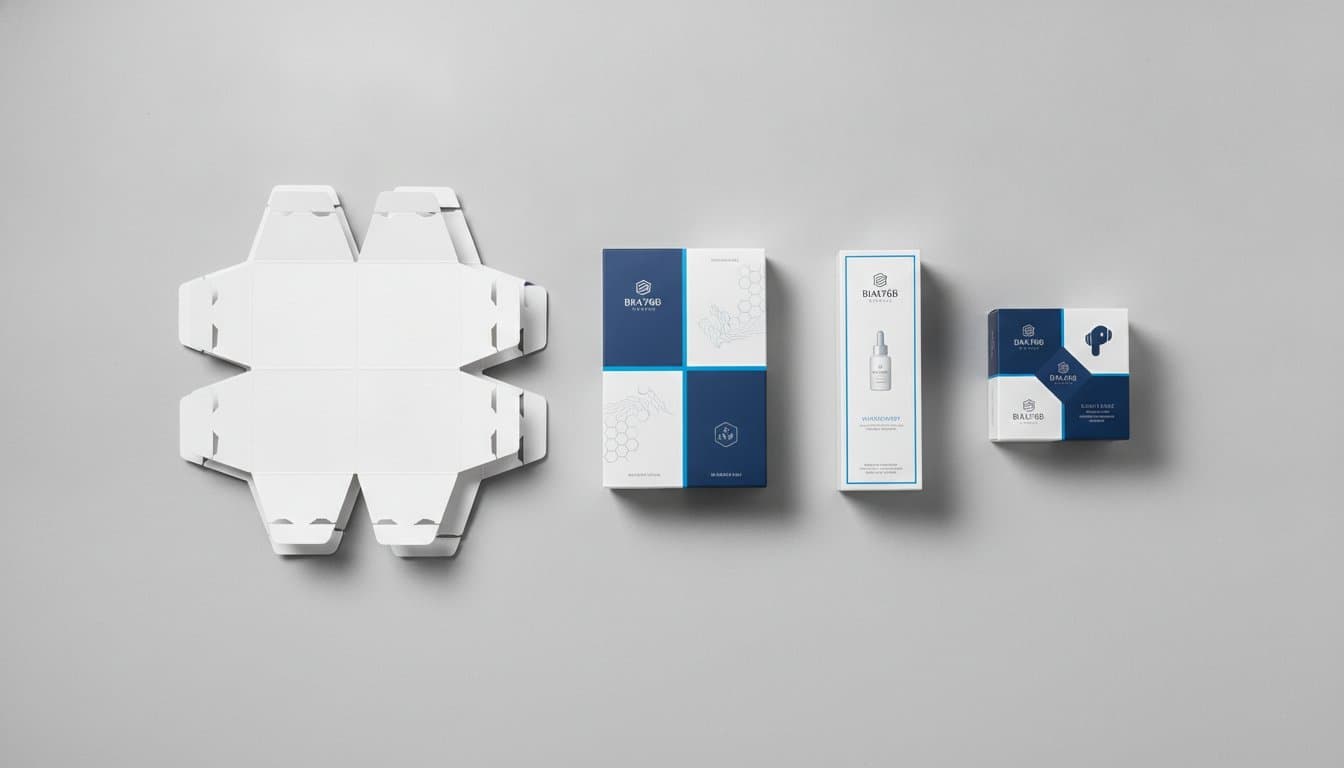
Our tuck box page lists five styles. The pattern below shows how they differ when laid flat.
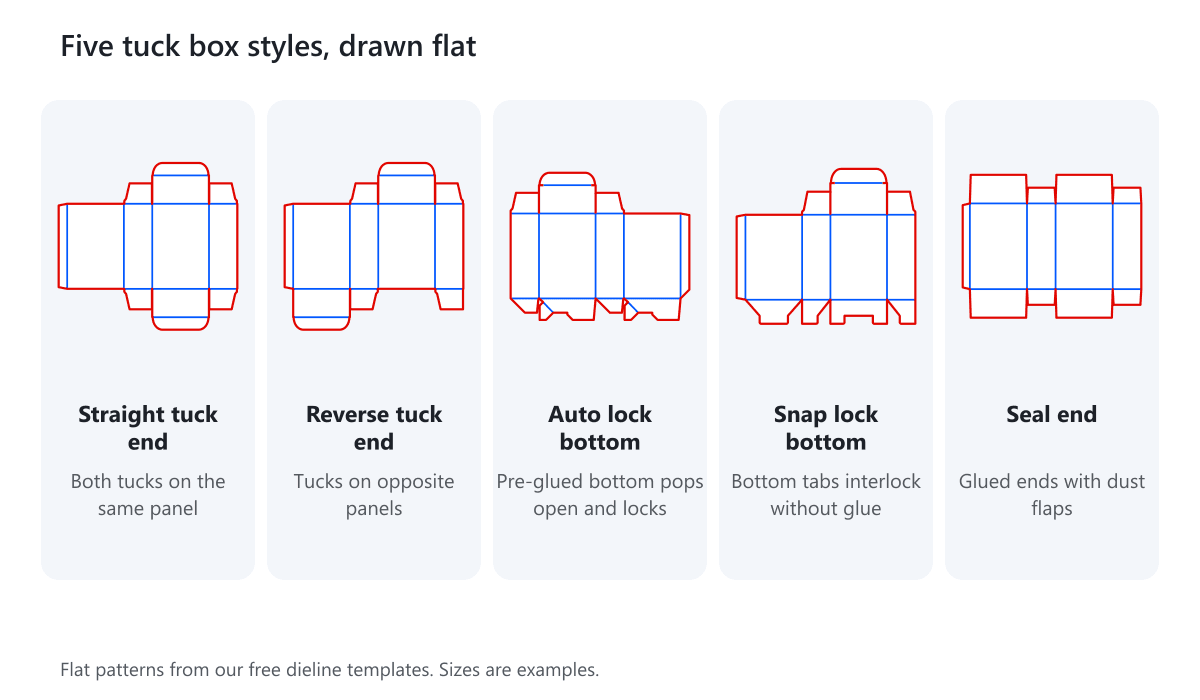
| Style | How it closes | Best for | Assembly |
|---|---|---|---|
| Straight tuck end | Both tuck flaps tuck in the same direction | Light products, clean look | Some assembly |
| Reverse tuck end | Flaps tuck in opposite directions | The same, with possible savings on the sheet | Some assembly |
| Auto lock bottom | Pre-glued bottom pops up and locks | Heavier items, quick packing | Pops into shape |
| Snap lock bottom | Interlocking tabs click together | Heavier items, no glue or tape | Some assembly |
| Seal end | Overlapping flaps with dust flaps | Products that need dust protection | Some assembly |
Straight Tuck End (STE)
The top and bottom flaps are on the same panel and tuck in the same direction. It is the simplest, most familiar tuck box. It is easy to open and close, and it is a good default for light products. People also search for it as STE.
Reverse Tuck End (RTE)
The flaps tuck in opposite directions, so one is on the back panel and one on the front. The box looks much the same, and it opens just as easily. A reverse layout often lets the box patterns sit closer together on the printing sheet, which can use less board. Ask us whether that matters for your size and quantity.
Auto Lock Bottom (Crash Lock)
The bottom is glued at the factory. Open the carton and the bottom snaps into place by itself, so nobody has to fold it. It is also called a crash lock bottom, and it suits heavier items and fast packing. Our page notes that the top can be a tuck top or a fold-over top.
Snap Lock Bottom
The bottom has interlocking tabs that snap together without glue or tape. Our page recommends it for heavier items, and it stores flat until needed.
Seal End
The ends use dust flaps and two overlapping flaps. It adds protection against dust and damage, and it suits products that need extra care.
Straight or Reverse? How to Decide
The body of both boxes is the same size. The difference is only where the flaps sit. The picture marks the tuck flaps so you can see it.
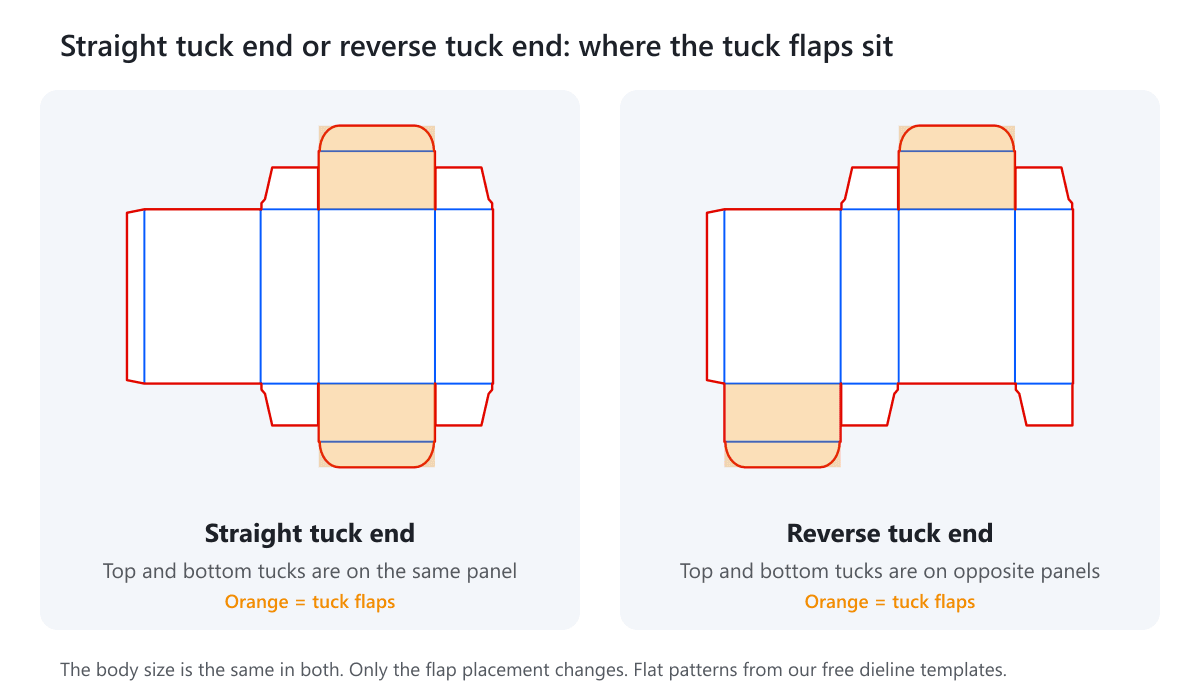
Use these questions to choose.
- What will customers see first? Think about which edges show on the shelf. With a straight tuck, both flap edges are on one side. With a reverse tuck, one edge shows on each side.
- Is there a window? A window sits on one panel. Make sure the flap placement does not collide with it.
- Is the print sheet tight? A reverse layout can nest more efficiently on the printing sheet. This only matters for cost, and we confirm it on the quote.
- Do you have a hang tab? The tab sits on one panel, so choose the layout that puts it on the side you want.
- Does the artwork have orientation? On a reverse tuck, the top and bottom ends open on different sides. Check the artwork on the flat pattern before you approve it.
If both fit, pick the one you like. Many brands cannot tell them apart on a shelf. For help, try the free dieline templates for the straight tuck end and the reverse tuck end and compare.
Closures and Features That Change How a Box Works
Our tuck box page lists more than 20 features. These six are the ones most buyers ask about.
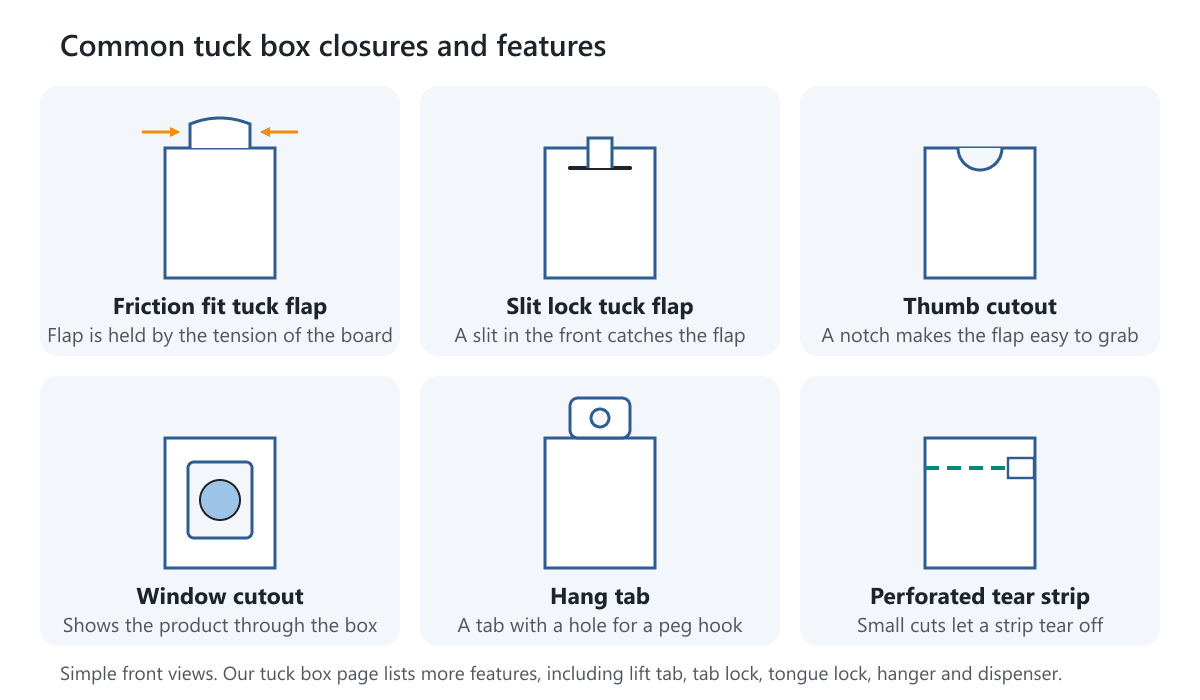
- Friction fit tuck flap. The flap stays shut by the tension of the board. It is the lightest, cleanest option, and it is easy to open again.
- Slit lock tuck flap. A slit in the front panel catches the flap, so it will not pop open as easily. It suits boxes that are handled a lot.
- Thumb cutout. A notch at the edge so the customer can lift the flap. Useful for boxes that open often.
- Window cutout. A hole shows the product. It builds trust, but the product must sit still behind it, so size the box snugly or add an insert.
- Hang tab. A tab with a hole for a peg hook, so the box hangs on a rack. Our page also lists a hanger and a side hang tab.
- Perforation. A line of small cuts so a strip tears off. It is used as a first-open seal or a pull strip.
There are also lift tab, tab lock, tongue lock, anchor lock, lock cap, locking dust flap, adhesive strip, corner punch out and dispenser features. Pick the fewest features that do the job. Every extra feature adds a step, and some add cost.
How to Keep a Tuck Box From Popping Open
- Size the fit. A box that is too big lets the product push on the flap. See our size guide.
- Choose a slit lock or tab lock for boxes that are handled often.
- Add locking dust flaps to hold the flap in place.
- Use a lock bottom if the weight is pulling the bottom open.
- Test with a sample. Shake it, drop it gently and stand it on its end.
Sizing a Tuck Box
Size the box from the inside. Measure the product with its cap, wrap and insert, then add about 1/16 to 1/8 inch (1.5 to 3 mm) on each side, plus a little extra in height so the tuck flap can close without pressing on the product. Write it as length x width x height, where length and width describe the opening. Our size guide works through examples, and the measuring guide covers inside and outside sizes.
Two tuck-specific points are worth remembering. The tuck flap folds into the box, so it takes up part of the height. And when a product is much taller than it is wide, such as a bottle, the tuck can be tight. A sample shows this fast, and the free tube holder tuck end template shows one option for tubes.
Materials and Finishes for Tuck Boxes
Our tuck boxes use paperboard in a thickness of 300 to 400gsm, depending on size. The choices are white (SBS) board for bright color and brown kraft for a natural look. The printing is CMYK or Pantone, and the coating is varnish or lamination. Finishes are matte, glossy, satin or soft touch.
Foil stamping, embossing or debossing, and spot UV can sit on top. The paperboard guide explains what each choice does and costs. For tuck boxes, three points matter most.
- Match board to weight. A glass jar needs heavier board and a lock bottom, and a lip balm does not.
- Choose the finish for handling. Boxes picked up by many hands do better with a coating that resists scuffs.
- Keep effects simple. One finish on the logo often reads as more premium than several.
Artwork Tips for Tuck Boxes
A tuck box has more surfaces than people expect, and some of them are hidden. Plan the artwork on the flat pattern, not only on a 3D mock-up.
- Know what shows. The front, back and sides show on the shelf. The ends and the inside of the tuck usually do not.
- Keep text off the folds. Text on a crease can crack or split. Leave a margin inside each panel.
- Mind the tuck flap. Anything printed on the flap is hidden once the box is closed, and the flap placement changes between straight and reverse tuck.
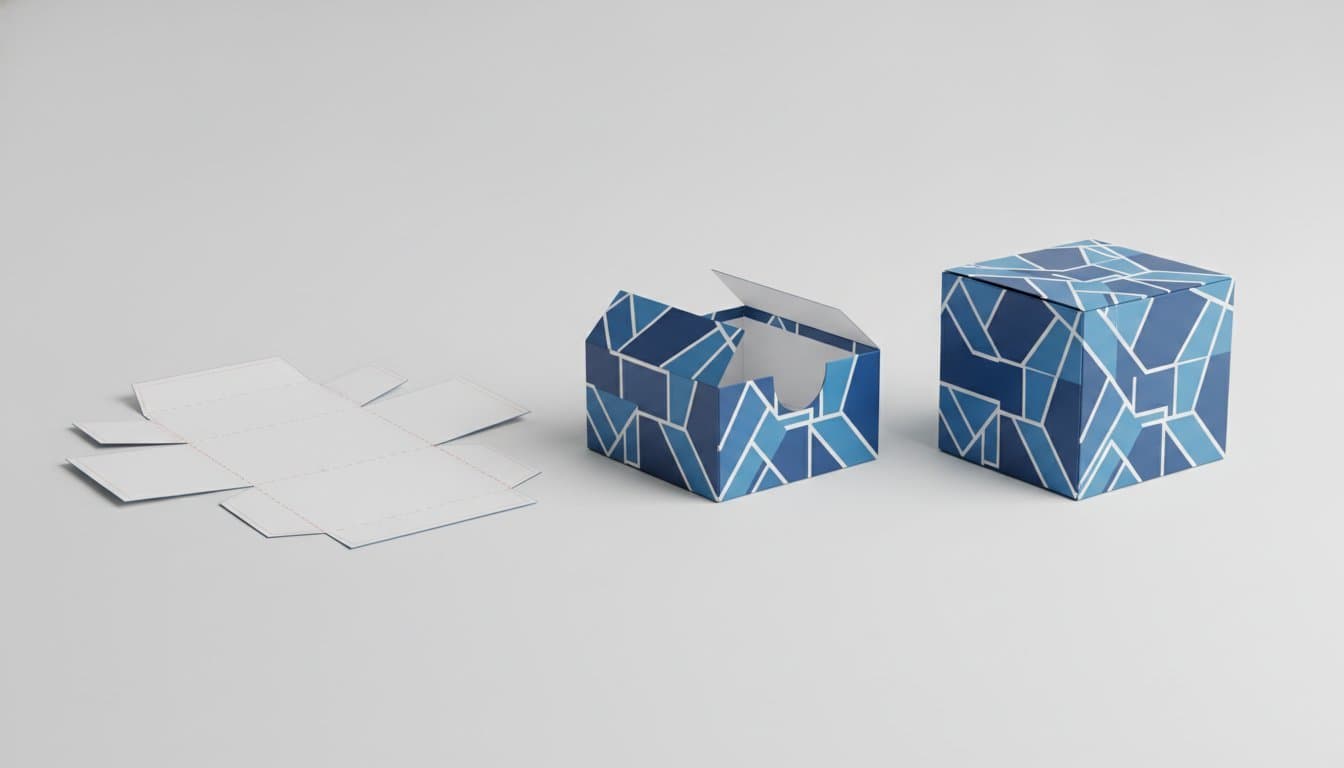
- Print the inside if it helps. The inside can carry a message or a pattern, as in the example above.
- Use a bleed. Extend background color past the cut line, so a small shift does not leave a white edge. Our guide to what bleed is shows how.
- Check windows and hang holes. Keep logos and small text away from them.
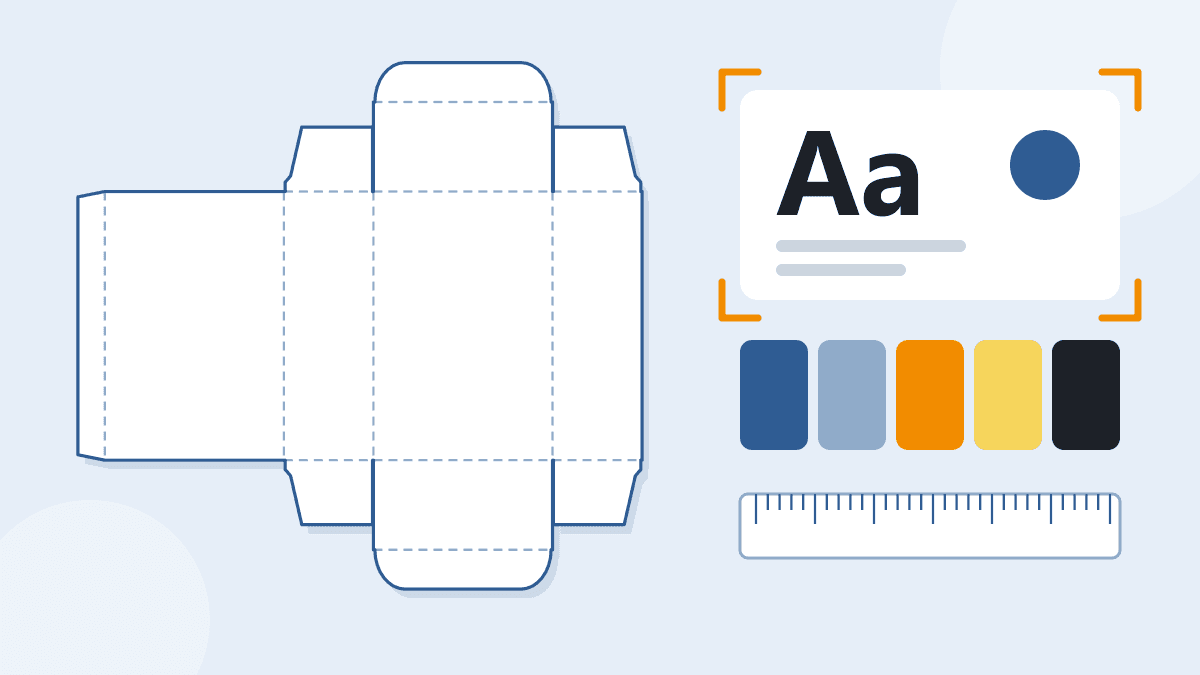
The free dieline templates give you a real-size pattern in PDF, SVG or DXF. Our dieline help article explains the lines. We confirm the final dieline with you before printing.
Tuck Box Ideas by Industry
These are starting points. Pick the closure for the product and the way it is sold.
| Product | Style to consider | Features worth a look |
|---|---|---|
| Lipstick, serum, cream | Straight or reverse tuck end | Snug fit, soft touch or foil on the logo. See cosmetic packaging |
| Supplements and small bottles | Straight tuck end or seal end | Dust protection, room for text. See supplements boxes |
| Bar soap | Straight tuck end, or a sleeve | Window to show the soap. See soap packaging |
| Candles in jars | Auto lock or snap lock bottom | Heavier board, insert. See candle boxes |
| Bath bombs | Straight tuck or window box | Fit for round shape. See bath bomb boxes |
| Small electronics, cables | Straight tuck end with hang tab | Hang tab, window. See electronics boxes |
| Chocolate, candy, tea | Straight tuck or seal end | Check the rules for food contact. See candy boxes |
If the box touches food or the product directly, tell us. We confirm the materials that suit the use. Regulated products such as medicines and supplements carry their own labeling rules, so check what applies to you.
Tuck Box or Another Style?
A tuck box is not always the right answer. Here is when to look elsewhere.
| If you need | Consider | Why |
|---|---|---|
| A box that ships alone | Mailer box | Corrugated board holds up in the mail |
| A slide-open gift feel | Tray and sleeve | A tray slides out of a sleeve like a drawer |
| A soft, curved gift pack | Pillow box | Curved ends interlock in one piece |
| A counter display | Display box | Opens to show the product |
| A premium keepsake | Rigid box | Thick board and a fixed shape |
Not sure which one suits you? Our guide to choosing the right box for your product matches common products to box types.
Shipping and Protecting Tuck Boxes
Tuck boxes protect and present a product, but they are not made for the parcel network. Our style pages say an additional shipping carton is strongly recommended. Put cartons in a corrugated shipper, and fill the gaps so they do not slide. A fragile product benefits from an insert inside the tuck box, and our box inserts page shows the options.
If you ship many single products, look at a mailer box instead. If you sell through stores, ship cartons flat in bulk, and have the retailer or your team assemble them.
Common Mistakes
- Using a plain tuck end for a heavy product that needs a lock bottom.
- Sizing a box with no room for the tuck flap.
- Putting a logo on the tuck flap, where it is hidden.
- Choosing a window for a product that moves behind it.
- Adding every feature instead of the ones that solve a problem.
- Treating the box as a shipping box.
- Skipping a sample before a full run.
Next Step
Open the free dieline template for the style you are considering, type your size and look at the pattern. If you want a second opinion, tell us what you sell, how it is packed and how many you need, and we will recommend a style, a closure and a board. The Standard Sample Kit costs $50, shipping included. Get a free quote, and we reply within 1 business day.
Frequently Asked Questions
What is the difference between a straight tuck end and a reverse tuck end box?
The body size is the same. In a straight tuck end box, both flaps tuck in the same direction, on the same panel. In a reverse tuck end box, they tuck in opposite directions, on opposite panels. Reverse tuck often nests better on the printing sheet.
What is a crash lock or auto lock bottom?
It is a bottom that is glued at the factory. When you open the flat carton, the bottom locks into place by itself, so nobody has to fold it. It suits heavier items and fast packing. See the auto lock bottom page.
How do I stop a tuck box from popping open?
Size the box so the product does not push on the flap, then use a slit lock or locking dust flaps. Use a lock bottom for heavy products. Test a sample by shaking it and standing it on its end.
Can I ship products in a tuck box without another box?
Not safely. Tuck boxes are retail packaging, and our style pages recommend an additional shipping carton. Use a corrugated shipper, a poly mailer or a mailer box for transit.
How thick are tuck boxes?
Our tuck boxes are made from paperboard of 300 to 400gsm, depending on size. White (SBS) and brown kraft are available. Heavier products or bigger boxes use the upper end.
What is the minimum order for custom tuck boxes?
Tuck boxes start at 100 units. Each product page states its own minimum. Get a free quote and we will confirm it for your style.
Do I need an insert in a tuck box?
Use an insert if the product is fragile, has several parts or must stay centered behind a window. For a simple, solid product, a snug fit is often enough. Order a sample to check.
Written by the PacksDo Team
We make custom printed packaging, from boxes and mailers to bags, labels and inserts. Questions about this guide? Ask us.